Whether it’s for fun or for serious business use, you don’t disagree that Face swapping between two photos is an art. It’s also a very innovative graphic design work. If you are new to Photoshop, then your learning is not finished yet with at least one Face Swapping or Morphing job. Sometimes it’s a great way to make fun of your friends or make them feel special or give them a bit of a surprise maybe you are planning for a great haircut or hairstyle that suits you best, then face swapping on Photoshop is your best solution.
Face Morphing and Swapping also have serious demand in the printing industry like magazines, newspapers, movie posters, banners, etc. Although there is a question is it ethical or not, Swap faces birthday cards and face swaps Christmas cards are very popular. Though there is an ethical question about face swap, there are also lots of people who won’t face swap animals, face swap babies, face swap with dogs, and many more. Regarding this fact, we have created here a face swap tutorial that must

be very helpful for beginners.
There is a little difference between Face Morphing and Face Swapping in Photoshop. Face swapping is like replacing almost all of the pixels in the original face. On the other hand, Face Morphing can mean stitching and blending some of the pixels of both faces. In this article, we have mainly focused on Face Swapping only. But, for readers, we have used Face Swapping and Face Morphing as synonymous to each other so that readers can understand them properly.
There are a lot of faces swap apps available on the internet, but if you try these face swap online apps, there is a possibility of face swap failing most often. Considering the performance of the face swap technology, Photoshop is the best face swap service. This very face swap editor has a bunch of tools and options which will provide you quality and ease service during swap faces from two different photos while giving you the best face-swapping experience. There is a lot of software on face swaps such as GIMP, Lightroom, After Effects, and various apps in Snapchat, etc. but Photoshop will be easier for beginners.
Here I am discussing the whole process step by step:
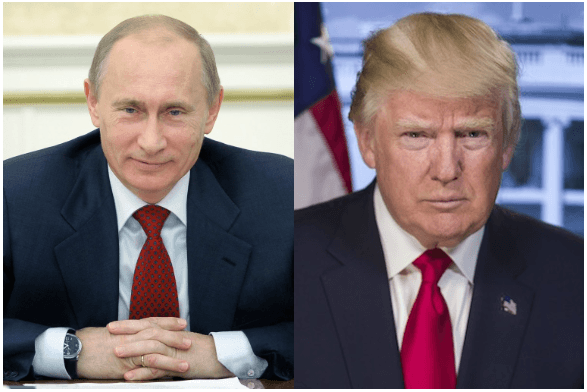
- At first, you have to select two same-alignment images you want to face-swap in Photoshop. We have taken two images of American President Donald Trump and Russian President Vladimir Putin for this face swap tutorial purpose.
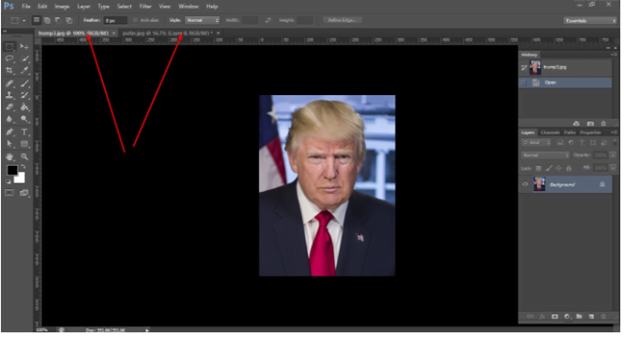
- Open the two images in Photoshop in two different tabs (Look at the snapshot we have pointed out with the red arrow below). We keep the image of Trump in the first tab and there is the photo of Putin in the second tab. Now, we like to swap Putin’s face for Trump’s face. That is why we open the Trump image in the first tab and the other in the second tab.
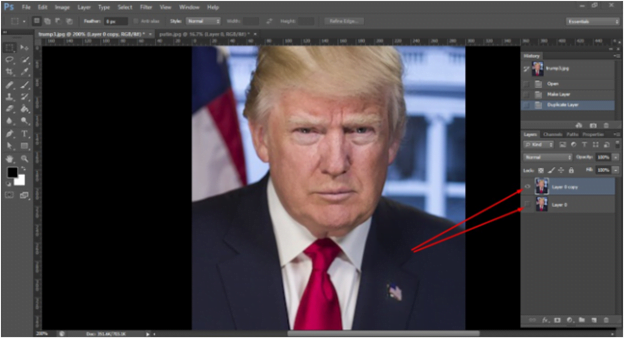
- Zoom (Ctrl +) the first photo and duplicate the layer as we have shown in the image below.
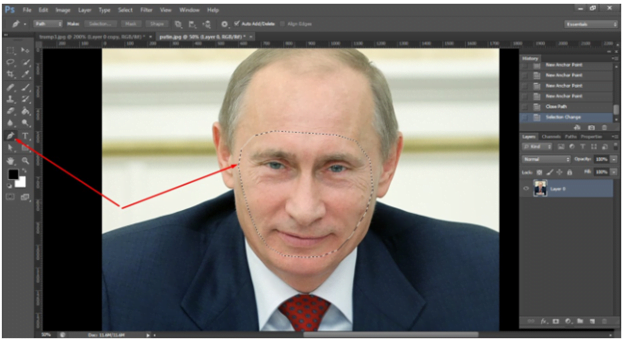
- Next, go to the second image and create a path around the only face leaving hair and ear using Pen Tool. After finishing creating the path, press Ctrl + Enter to have selected the path and copy by pressing Ctrl + C. We have shown the image below for your better understanding.
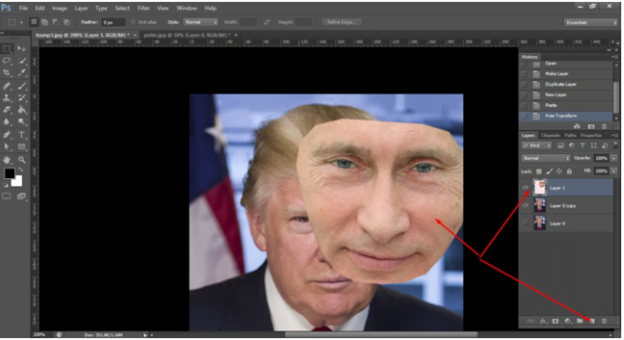
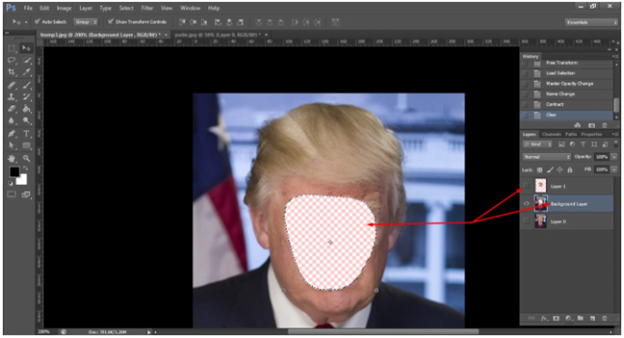
- Now Go to the first image and make a new layer from the layer panel and press Ctrl + V, paste that face you have copied from the second image. You can follow the snapshot below.
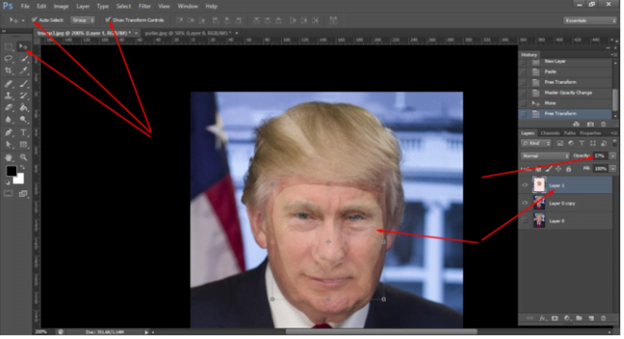
- Now, select the Move tool and tick on the check box of Auto-select and Show Transform Controls. Then, select the copied-face layer and reduce the opacity so that you can see the bottom layer through it. This opacity change will help you to place the face in the right position- eyes on eyes and nose on the nose.
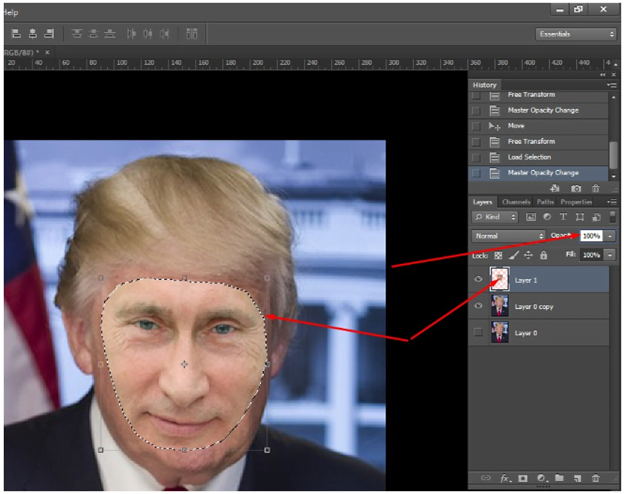
- By pressing Ctrl, click on the thumbnail of layer 1 to have the selection and make 100%, the opacity of layer 1 that you reduced while adjusting.
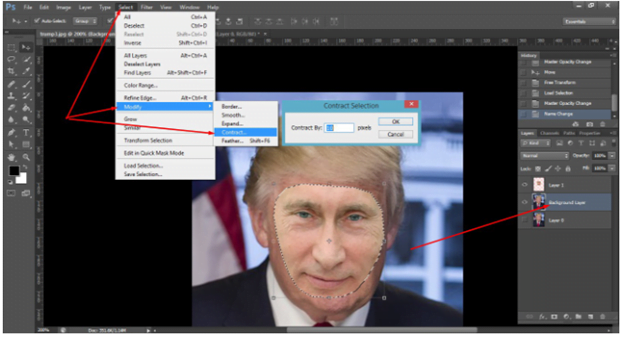
- Now you have to adjust the face on the background layer (we renamed it) and so. Go to Select menu from the top menu. Then, take the cursor on Modify from the dropdown, and click on the Contract. A new dialogue box will appear and provide 10-pixel property (It depends on your image). Finally, click on Ok and you can see that the face you took from the second image will get fixed on the background image.
- Click on the Background layer and press Backspace to make the adjustment face transparent. Before getting the transparent face, make sure you have hidden the first layer. You can follow the below snapshot.
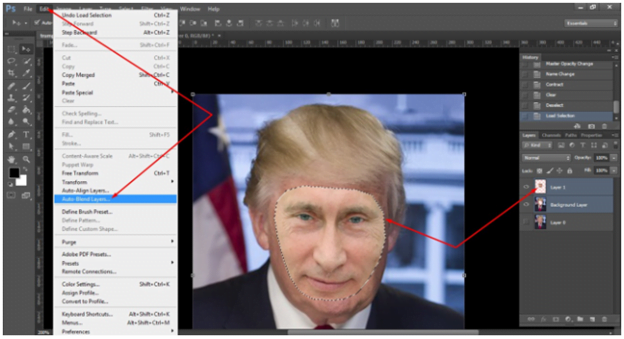
- Now, pressing Ctrl + D, deselect the adjustment face, and by holding Ctrl, click on the two layers together- background layer and layer 1 for selecting.

- Now, in this stage, we will blend two faces together and that’s why to go to Edit from the top menu bar. You will get a dropdown and click on the Auto-Blend Layer. Remember, you should make it visible and keep selecting the top face.
- A pop-up box will appear. Click on the Panorama and provide a tick-mark on the check-box of Seamless Tones and Colors and finally click o
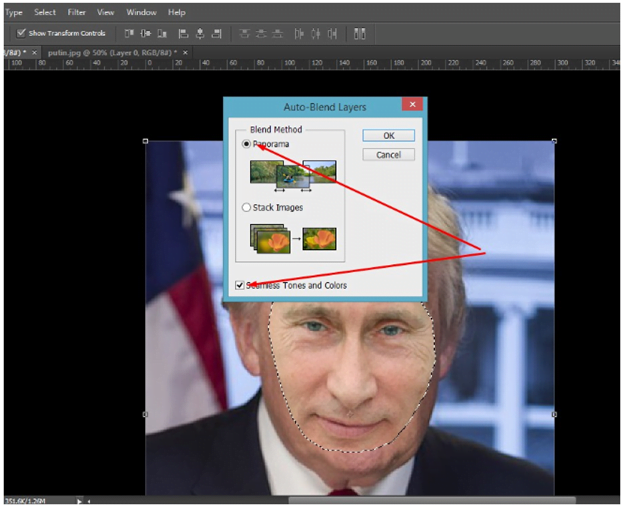
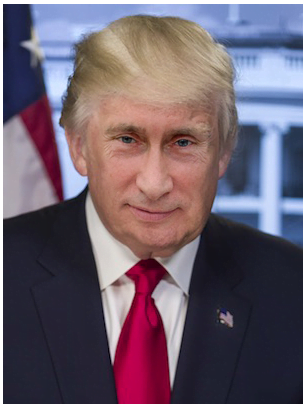
- Finally, you will feel the magic. Automatically, two layers of two faces will be blended and you will get your desired result. Look at the image below.
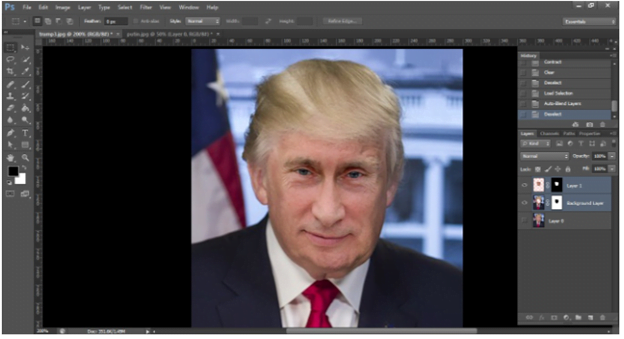
And it’s time to final output (Trumputin)
This is all about swapping faces using Photoshop. There are many other image-swapping tools but those may not produce desired quality face-swap photos. So we recommend Photoshop which is the best face-swap tool that can produce professional face-swap images. You can use it as a beginner and professional.
If you’d like, we can deliver your images with top-quality editing in the shortest possible time. Simply email us at [email protected] or send a free trial project to experience our quality and service firsthand.


