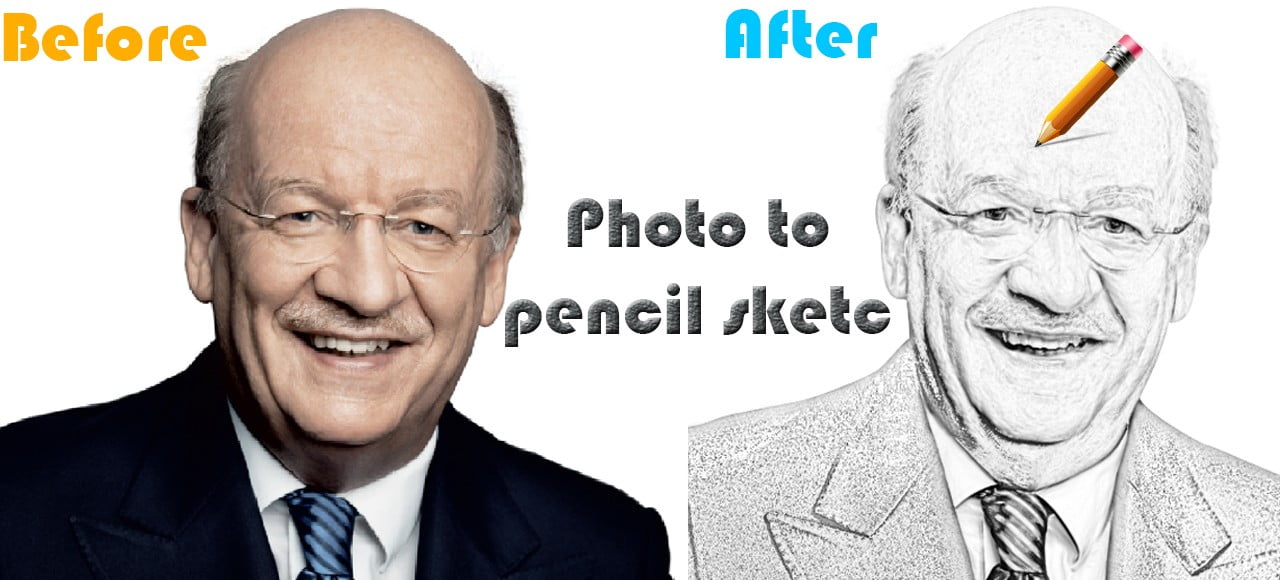
Learn how to turn a photo into a line drawing effect/sketch in Photoshop.
Welcome back with another basic tutorial for all Photoshop beginners. In this tutorial, you will come to know how to turn a normal photo into a pencil to sketch. Follow the following instructions and say “how easy”!
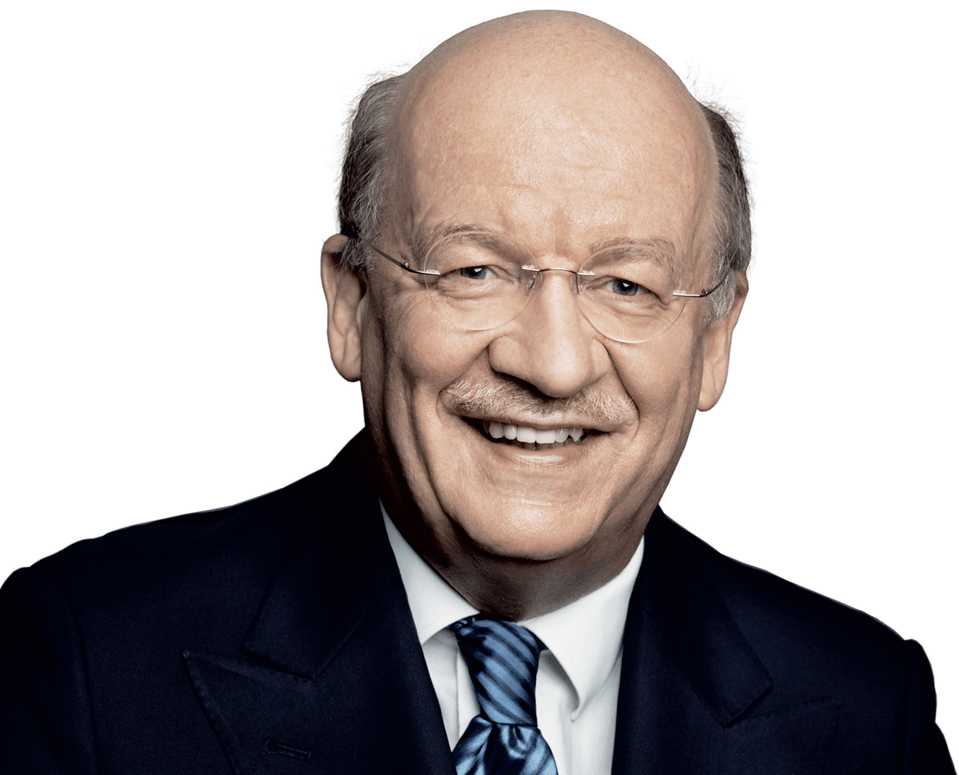
You can use these steps with any photo you have. But ensure that the image is on a white background.
Choose a photo with a white background:
First thing you need to choose an image from your desktop with a white background to have the best effect. If you haven’t any image with a white background, you can remove the background manually using the Photoshop pen tool or the image masking method if you have an image with hazy hair. If you can’t, we can follow another tutorial on how to remove the background from any image.
Duplicate background layer:
The second step is to get started from the background and put it by dragging into the duplicate layer showing below the layer panel left of the delete button. If you don’t know about using layers in Photoshop – you can easily get the basic knowledge about how to use layers in Photoshop.
![]()
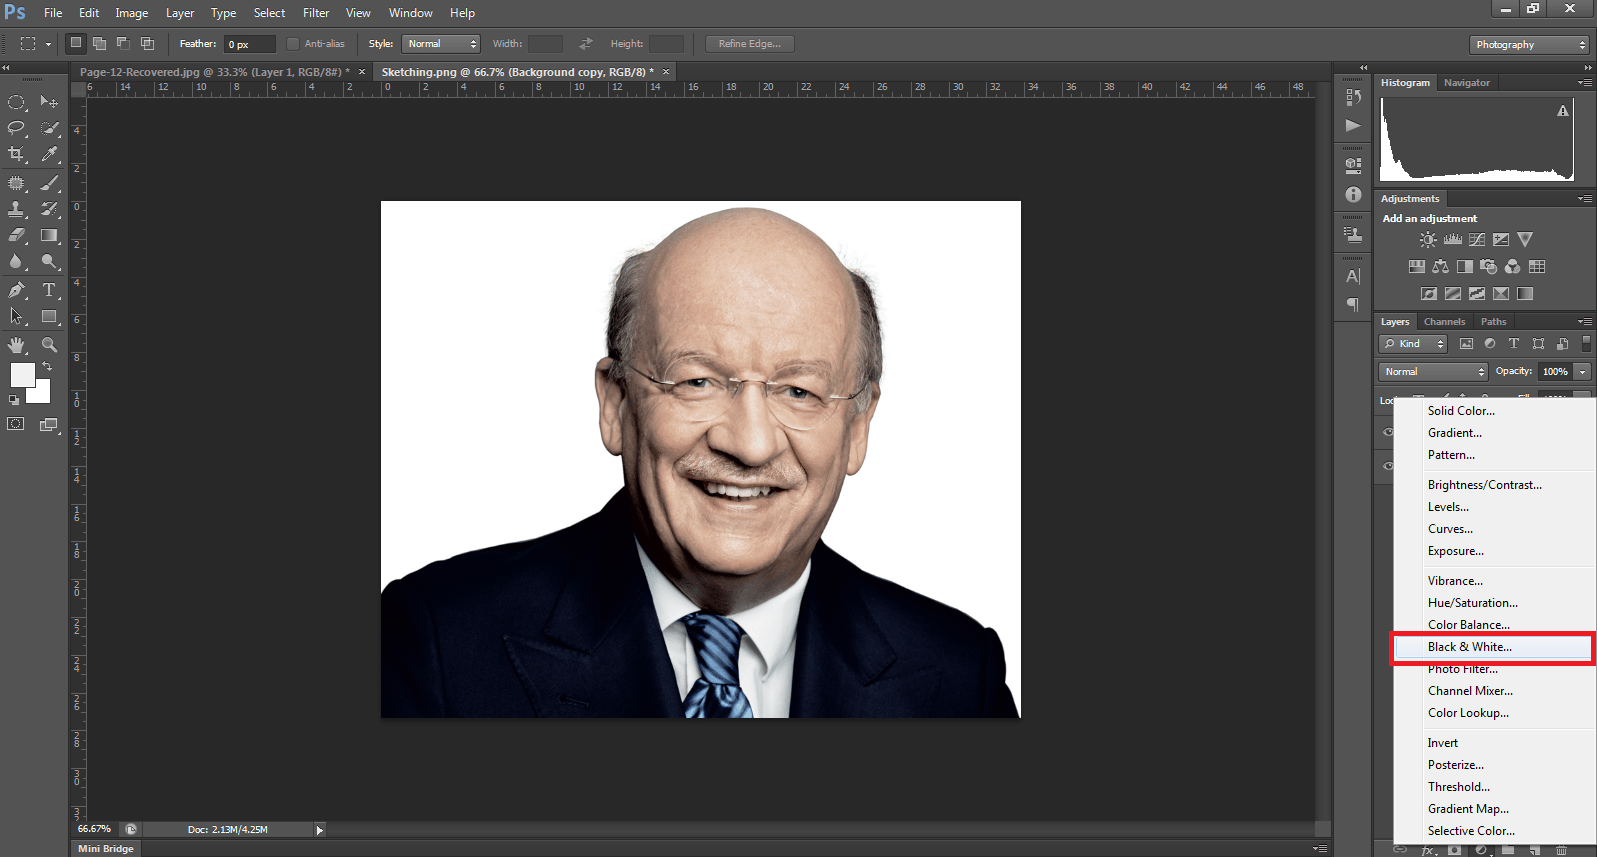
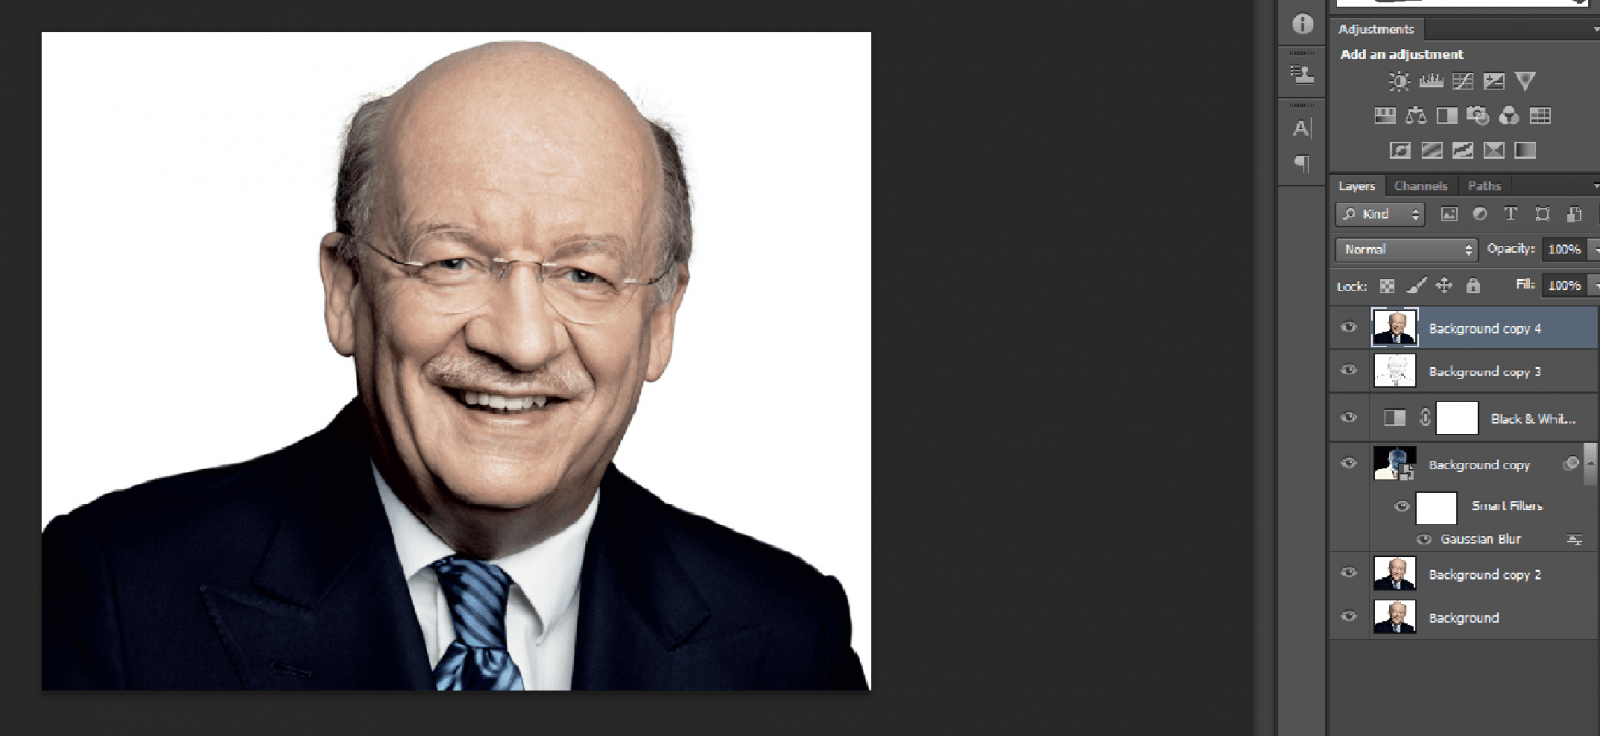
Converting a color photo to black & white:
Then we click the button named “Normal” and there will be a drop-down menu. There we will select the “Black & White” tab (then the photo will be turned into black and white rather than color). To close the drop-down menu – click the double arrow sign.
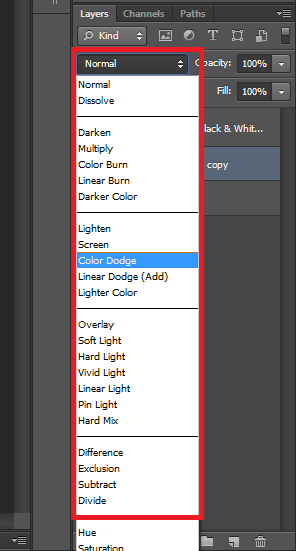
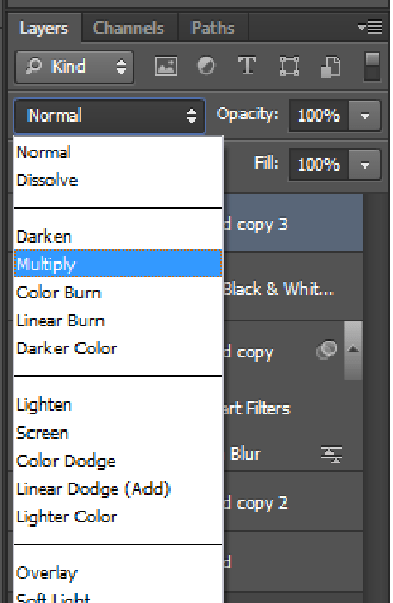
Blending mode changing:
After that we will go to the blending option and select the “Color Dodge” option. This will result the image more contrast.
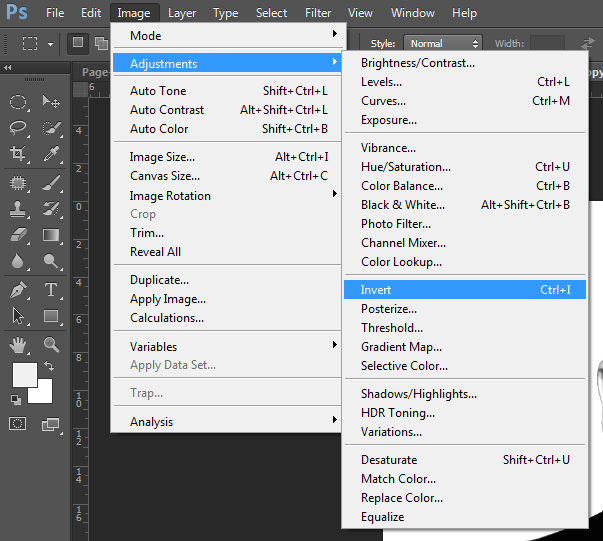
Invert the photo:
Then we need to invert the color following the steps below. Or you can go with Ctrl+I
Then you will see that the image is disappeared.
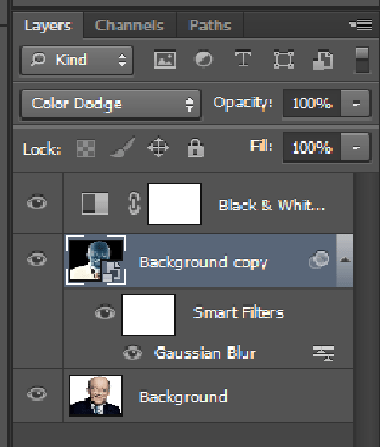
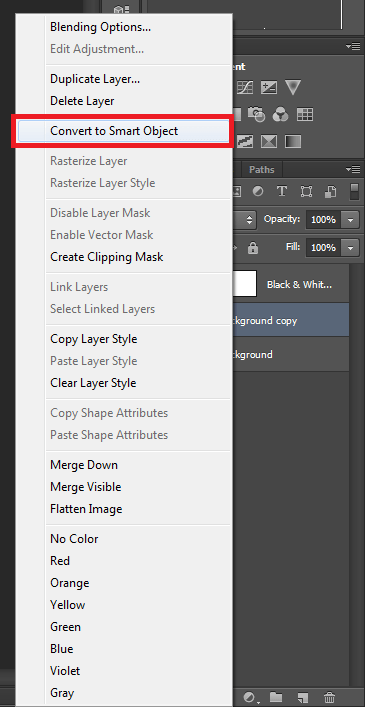
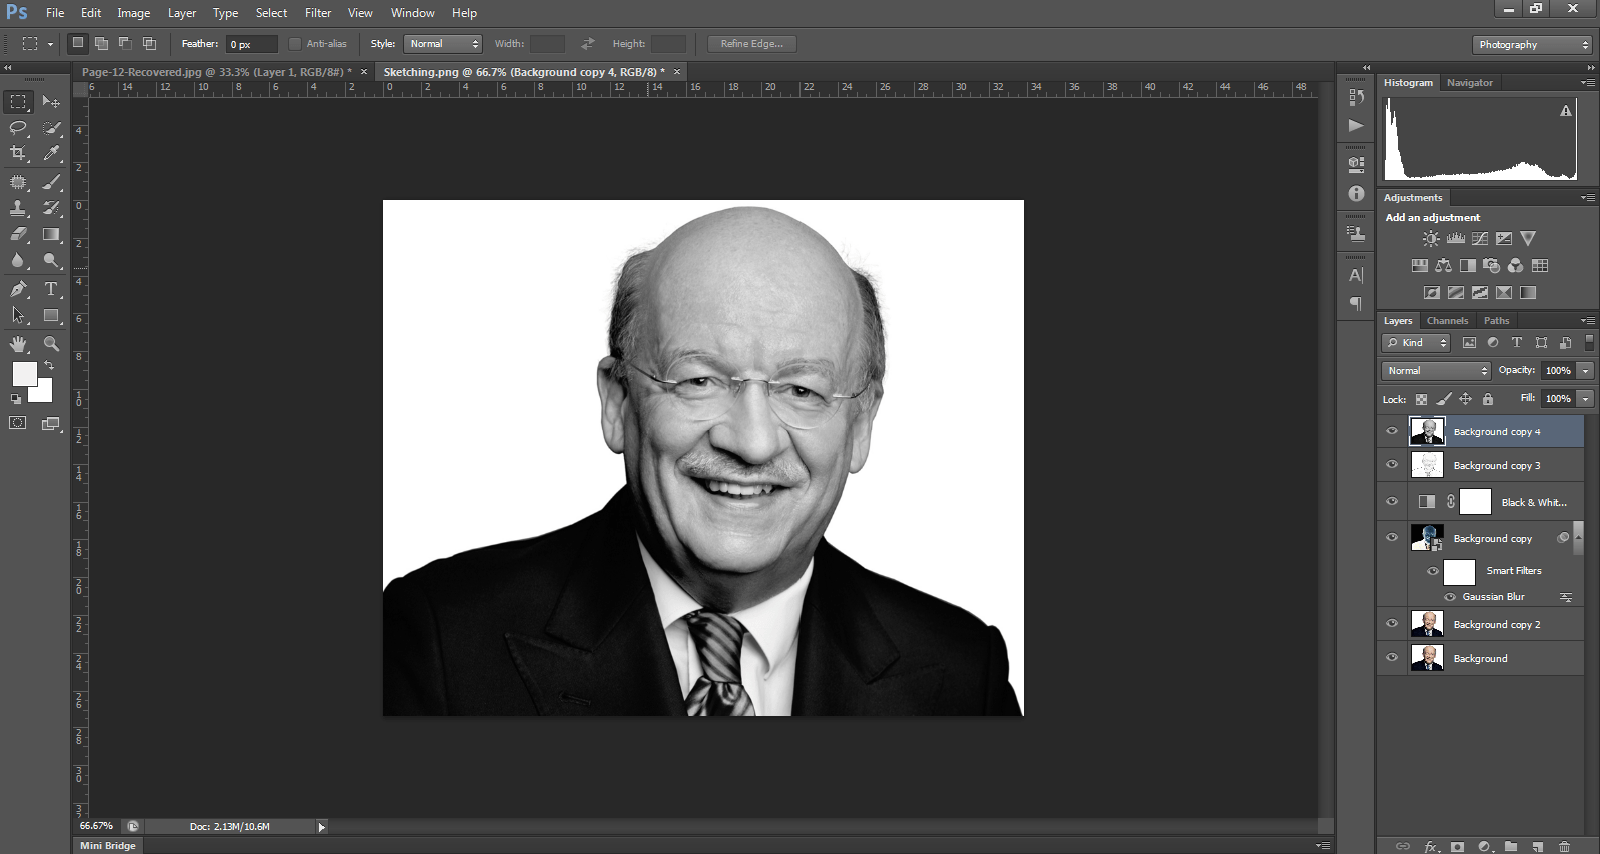
Convert the layer to a smart object:
Then we will right-click the copied background and select “convert to smart object” to convert the layer.
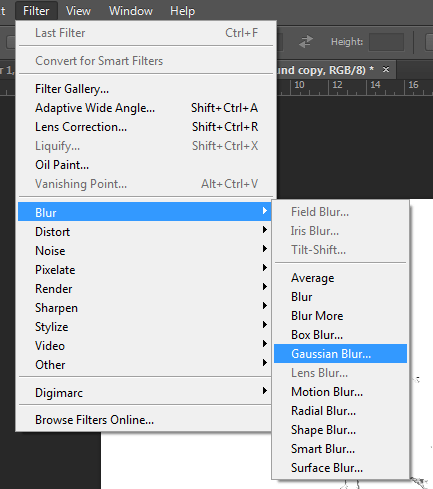
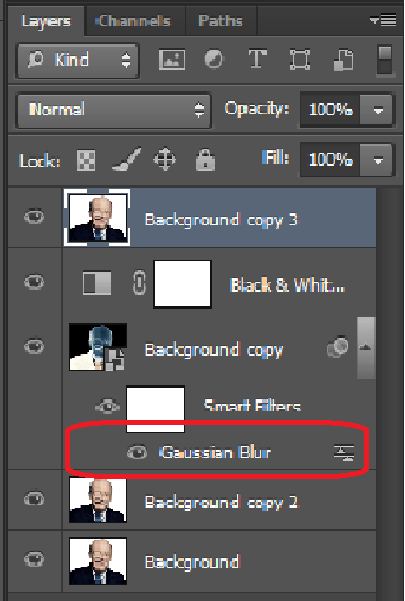
Implementation of Gaussian blur:
In the Filter above – there we will follow “Filter->Blur->Gaussian” Blur to have the effect.
Adjust Gaussian blur window:
Then we need to adjust the radius. There you select the radius 6.4. If you want can adjust with your own measurements.
![]()
You will find the Gaussian blur option is in the layer panel:
You will find the Gaussian Blur window in the layer panel.
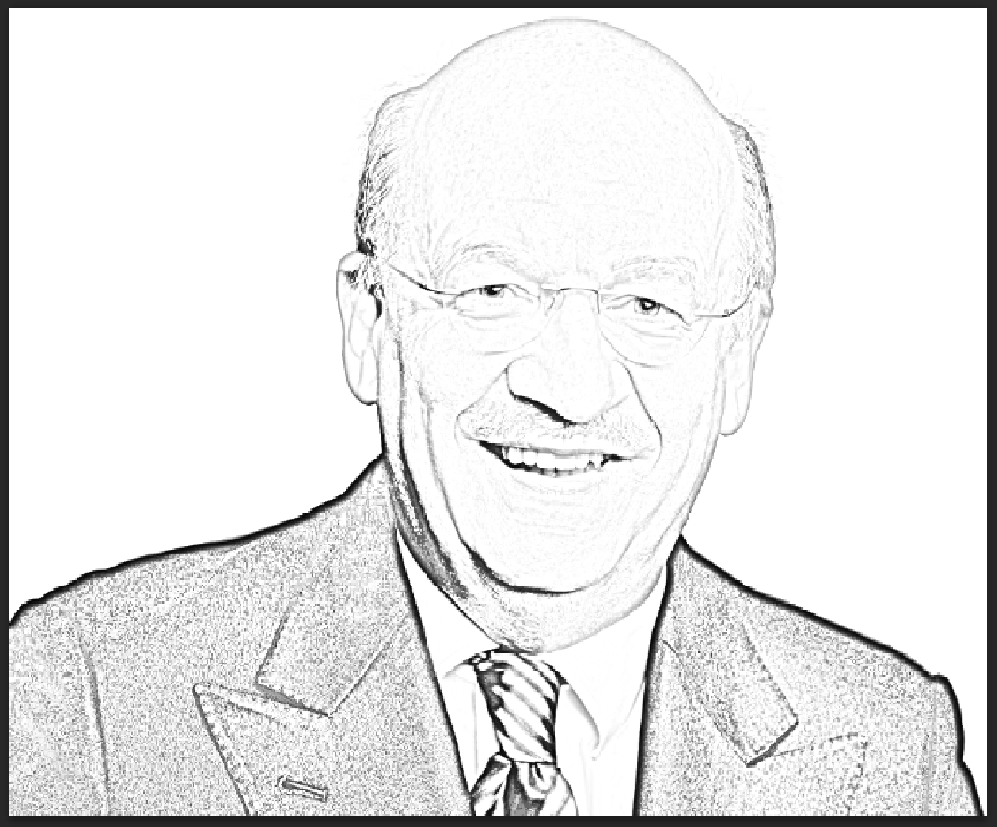
Simple line drawing effect:
You can use this sketching (line drawing) which I have created so far. If you want to make a more realistic effect can follow the following steps below.
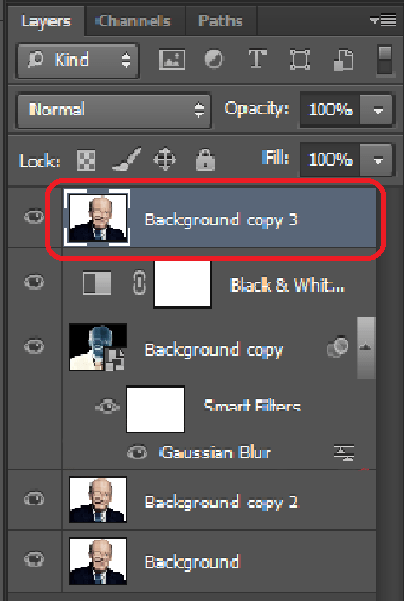
Again duplicate background copy layer:
After that we have to make again a duplicate layer using the Ctrl+J.
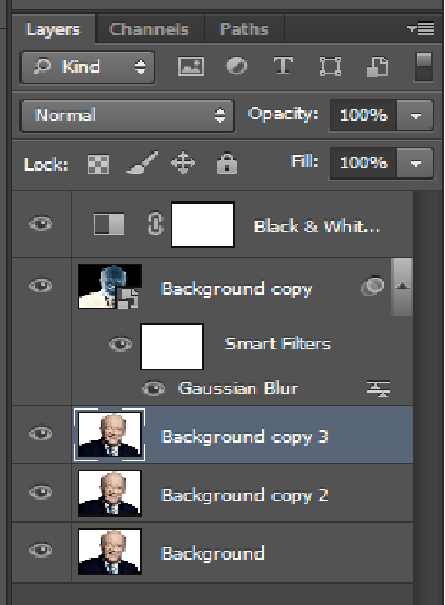
Drag/Move layer to top:
Then we will move or drag the copied layer to top.
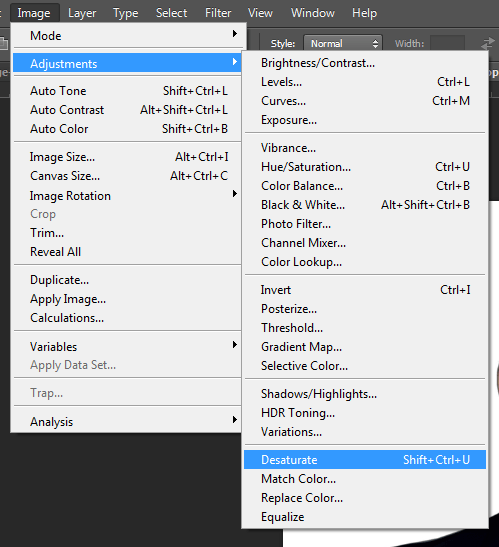
Desaturating top layer:
Next we will go to the top of the screen and do as follow — adjustments > desaturate
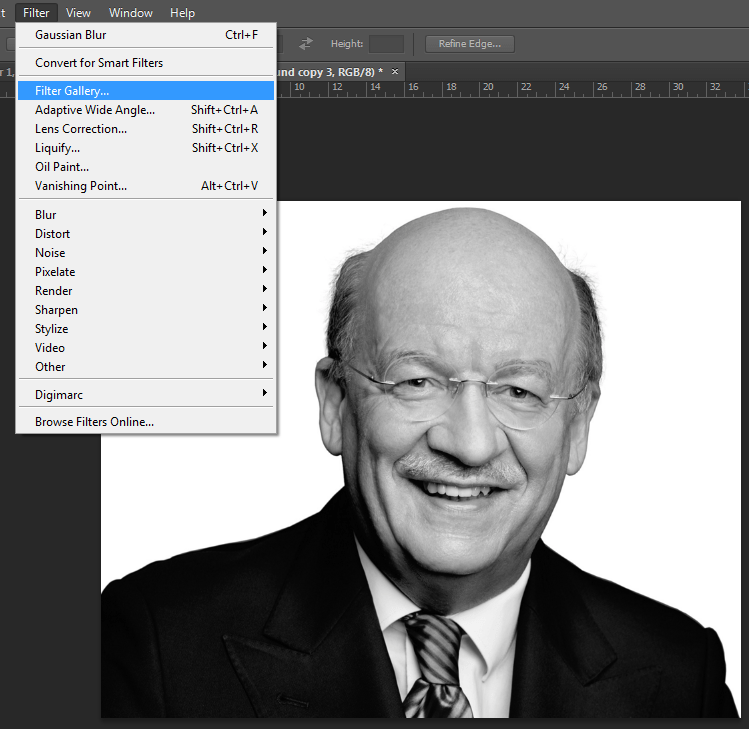
Apply filter gallery:
At next we will go to the Filter at the top of the image and click the Filter Gallery option. It results in a negative effect and will let you see the outline of the photo.
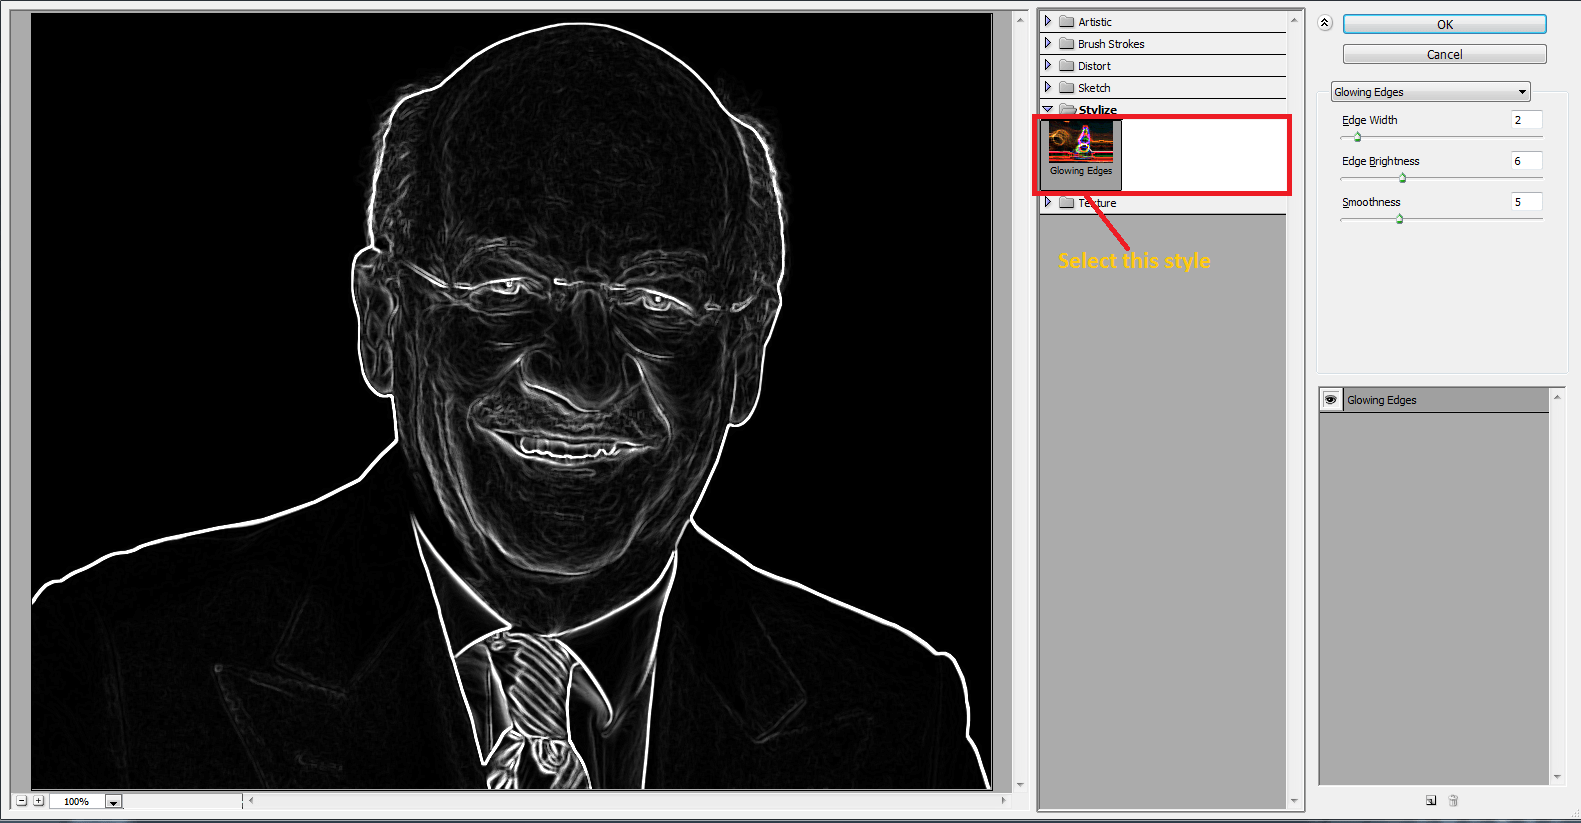
We have to adjust the style in the filter gallery:
You will see a white line out of the image. At the left of the image there, you will find an option “Glowing Edges” to make the edge sharp and adjust the brightness as you want. Finally, click finish to make the effect.
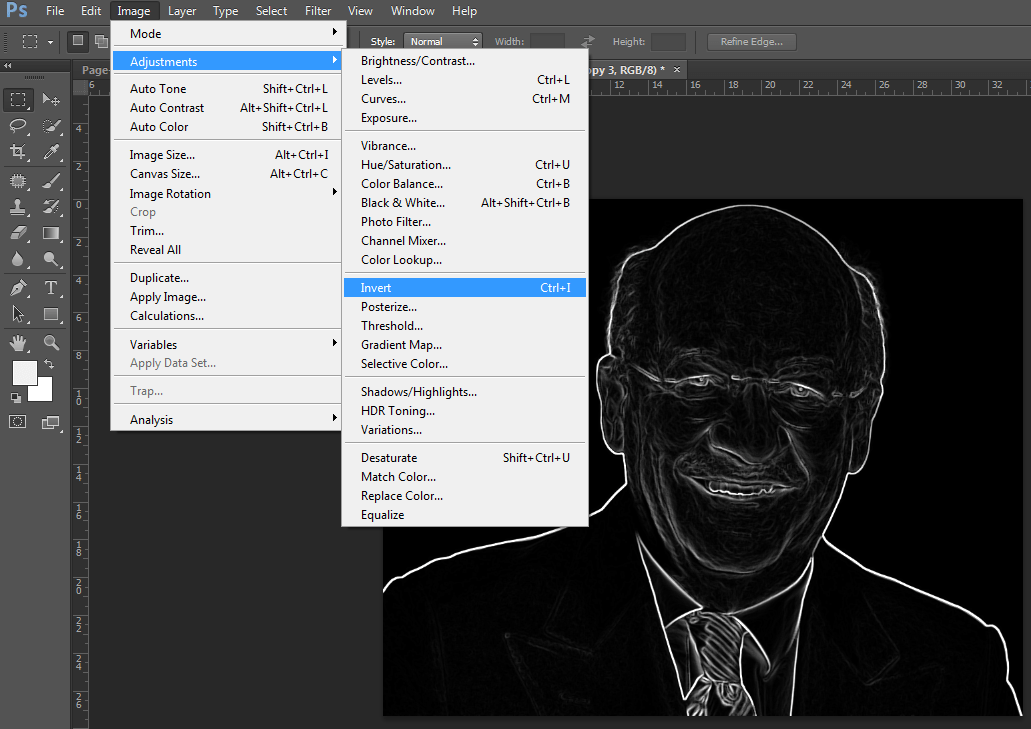
Inverting the image:
You will need to invert the image again with Ctrl+I or following the shown steps.
Changing the blending to multiply:
At last we need to remove the white color, to do this we will find the blend mode and need to change it to multiply.
Add shadow to the existing line drawing:
At next you might want to add a little shadow to improve the contrast of the sketch. In this step you have to click on the background layer and duplicate it again. Then you need to drag this copied layer to the top of the layers.
Desaturating the image:
Again we need to Desaturate the image like we did before.
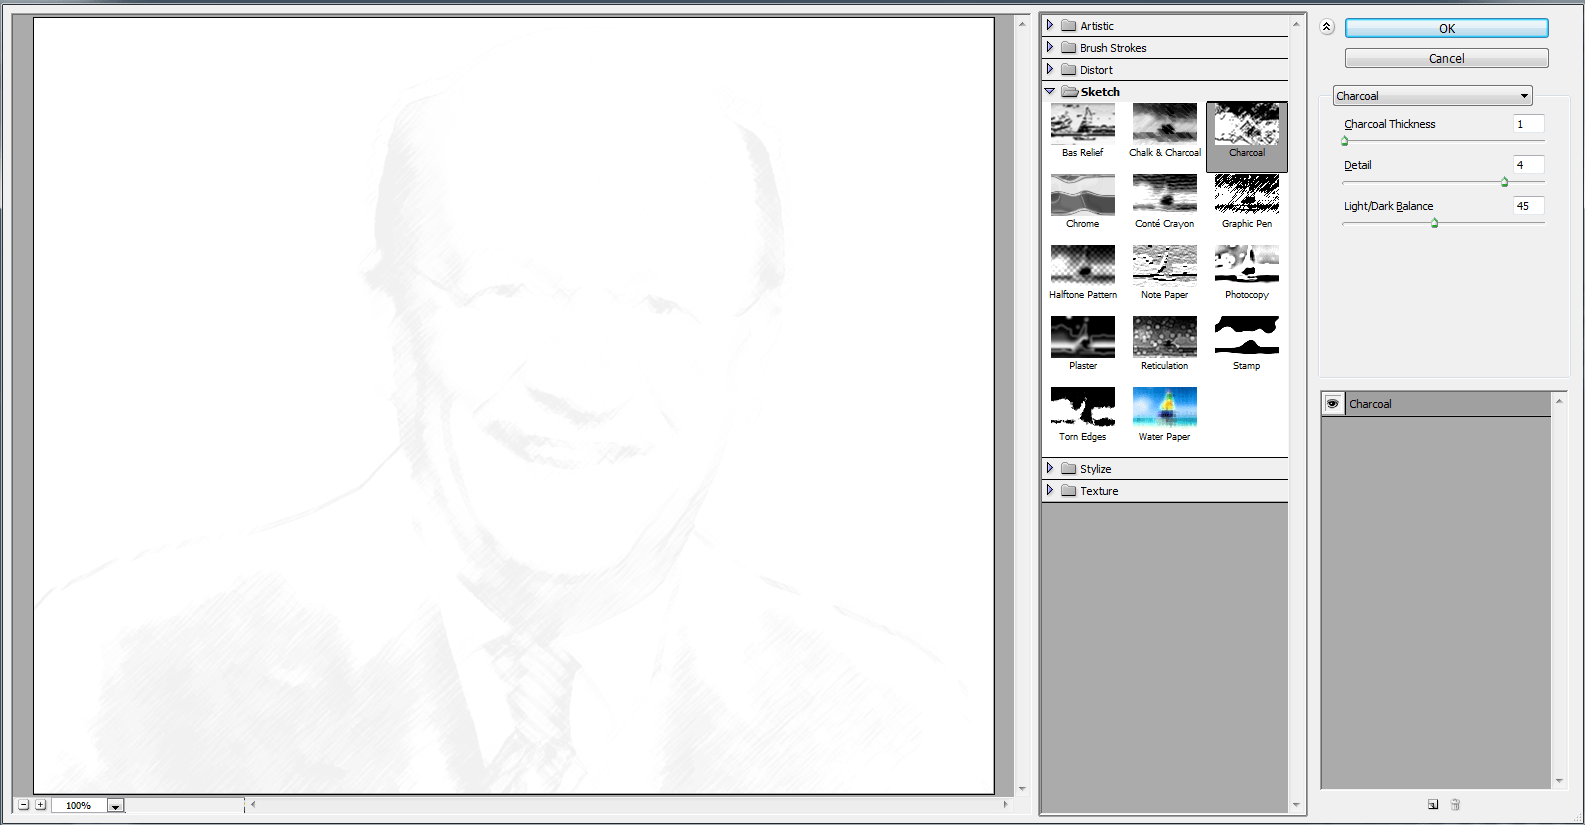
Applying the filter gallery:
Now you will go back again to the filter option and there select the filter gallery. After that there you will find a popup menu with sketch selection, and there you will select the sketch called charcoal. This will bring a result with a sketch effect that is nearly similar to the pencil-made sketch drawing. You need to adjust another setting according to your want. Click Ok at last.
Changing the blending to multiply:
At last we need to remove the white color, to do this we will find the blend mode and need to change it to multiply.

Before after result: