Editing is a crucial aspect of photography that can turn a good photo into a stunning one. Whether you’re a beginner or an experienced photographer, mastering editing techniques can take your photos to the next level. Here are seven essential editing techniques you should know:
Popular 11 Photography Angles for Photographers:
In this article, we’ll be delving into the different types of musical instruments and their unique characteristics. We’ll also be providing examples of how musicians use them in various genres of music and some tips to help beginners get started with playing each instrument.
1. Close-Up Shot:
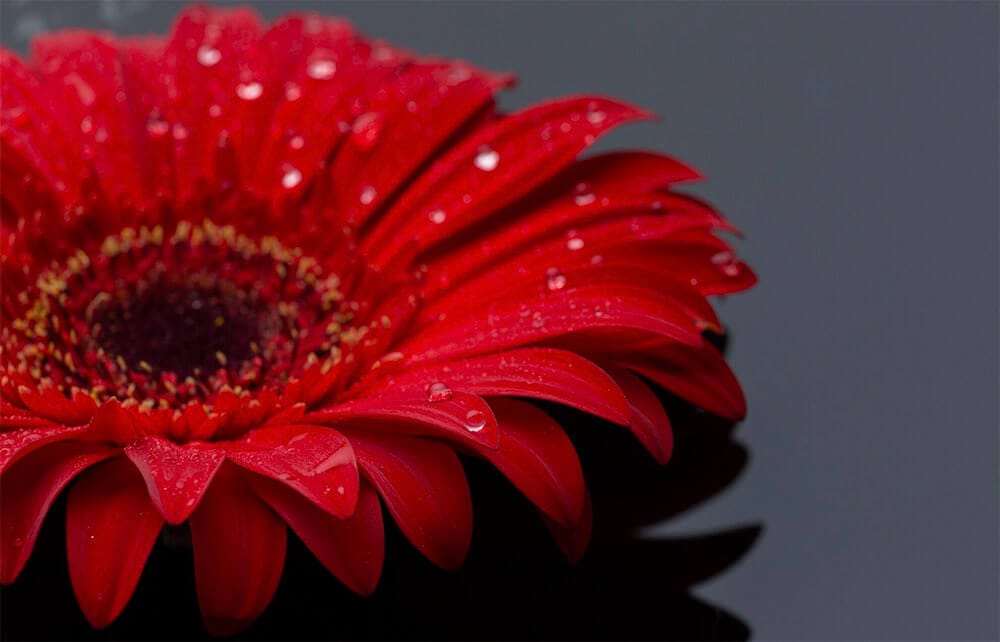
A close-up shot is a type of camera shot that captures the subject from a very close distance, usually focusing on a specific part or feature of the subject, such as the face, hands, or an object. This type of shot is used to emphasize the details and emotions of the subject and to create a sense of intimacy or intensity.
In a close-up shot, the subject is shown in great detail and fills the frame of the image. This allows for a close examination of the subject’s features, expressions, and emotions. Close-up shots are commonly used in portrait, product, and nature photography, as well as in film and television.
Close-up shots can be used to convey a range of emotions, such as sadness, joy, fear, or excitement. They are also useful for emphasizing the details of a product or object, highlighting its unique features or qualities.
Here are some close-up shot tips:
- Choose the right lens: A macro lens or a lens with a close-up filter can help you capture sharp and detailed close-up shots.
- Get close to your subject: Fill the frame with your subject to emphasize the details.
- Play with the depth of field: Use a shallow depth of field to blur the background and make the subject stand out.
- Pay attention to lighting: Good lighting is essential for close-up shots. Use natural light or a diffused artificial light source to avoid harsh shadows.
- Focus on the details: Pay attention to the details of your subject and capture them in a unique and creative way.
Recommended lenses for a close-up shot:
For close-up shots, the recommended lenses are macro lenses, prime lenses with a focal length of 50mm or longer, and zoom lenses with a telephoto range. Macro lenses are specifically designed for close-up photography and allow you to capture small details with sharpness and clarity. Prime lenses with a focal length of 50mm or longer offer a wide aperture, which helps to create a shallow depth of field and blur the background, drawing more attention to the subject.
Zoom lenses with a telephoto range, such as 70-200mm or 70-300mm, can also be used for close-up shots. These lenses allow you to zoom in on the subject from a distance while maintaining a close perspective and a shallow depth of field. They also provide versatility, allowing you to capture a range of shots without having to switch lenses.
2. Medium Shot:
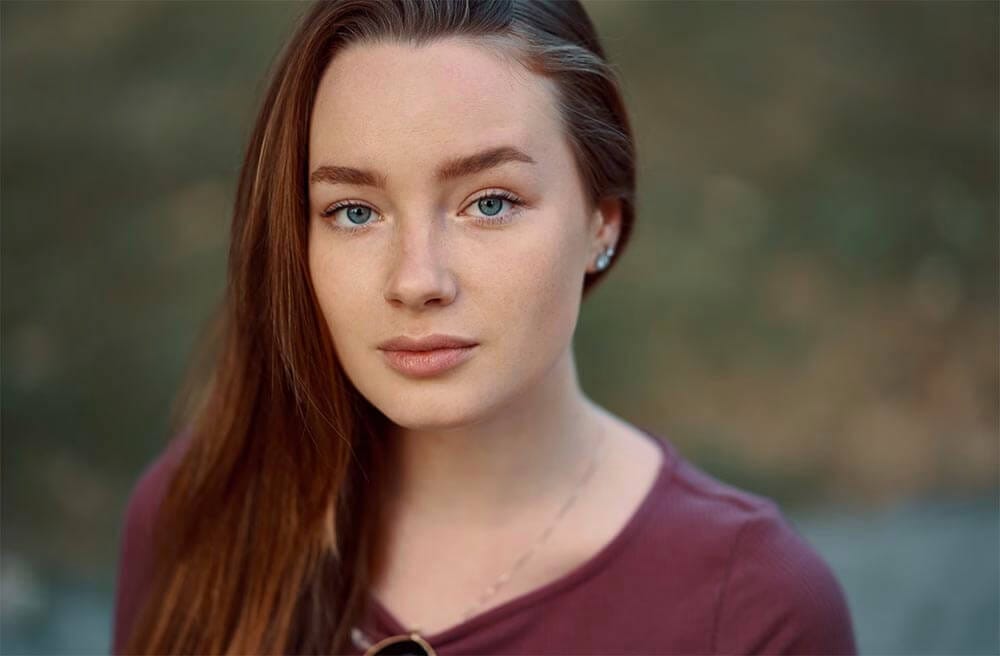
A medium shot is a type of camera shot that captures a subject from the waist up or from the knees up. This shot is used to show the subject’s body language and position while also providing some context. Photographers commonly use this technique in portrait, fashion, and street photography.
In a medium shot, the subject is shown in more detail than in a long shot, but less than in a close-up shot. This type of shot is useful for capturing the subject’s facial expressions, gestures, and movements, while also giving some indication of their surroundings.
Medium shots can be used in a variety of photography genres, including portraiture, fashion, and street photography. Examples of medium shots in photography include a person standing or sitting, a group of people, a building or architecture, or a landscape. Photographers can also use medium shots creatively to frame the subject with objects or elements in the environment.
Here are some tips for taking great medium shots:
Frame your subject in a way that balances the subject and the background, keeping in mind the context you want to convey.
Consider the subject’s body language: A medium shot is great for capturing body language and position, so take note of your subject’s posture and positioning.
Choose the right lens: Depending on the situation and the look you’re going for, you might want to use a wide-angle lens to capture more of the background, or a longer lens to create compression and separation.
Pay attention to lighting: Good lighting is essential for any shot, so take note of the light source and adjust as necessary to avoid harsh shadows or overexposure.
Direct your subject: Depending on the situation, you may need to give your subject direction on how to pose or stand. This can help you get the shot you want and create the desired mood or emotion.
Recommended lenses for the medium shot:
The recommended lenses for a medium shot depend on the specific requirements of the shot, including the distance from the subject and the amount of surrounding context you want to capture. However, some commonly used lenses for medium shots include:
50mm prime lens: This lens offers a natural perspective and is versatile enough to capture most medium shots.
35mm prime lens: This lens is wider than a 50mm lens and can capture more of the surroundings in a medium shot.
85mm prime lens: This lens can create a more shallow depth of field, making the subject stand out while still capturing some of the surroundings.
24-70mm zoom lens: This lens offers a range of focal lengths, making it a versatile choice for medium shots that require a change in framing.
70-200mm zoom lens: This lens is great for medium shots that require more distance from the subject while still capturing the surrounding environment.
Ultimately, the choice of lens for a medium shot will depend on the specific requirements of the shot and the creative vision of the photographer.
3. Long Shot:
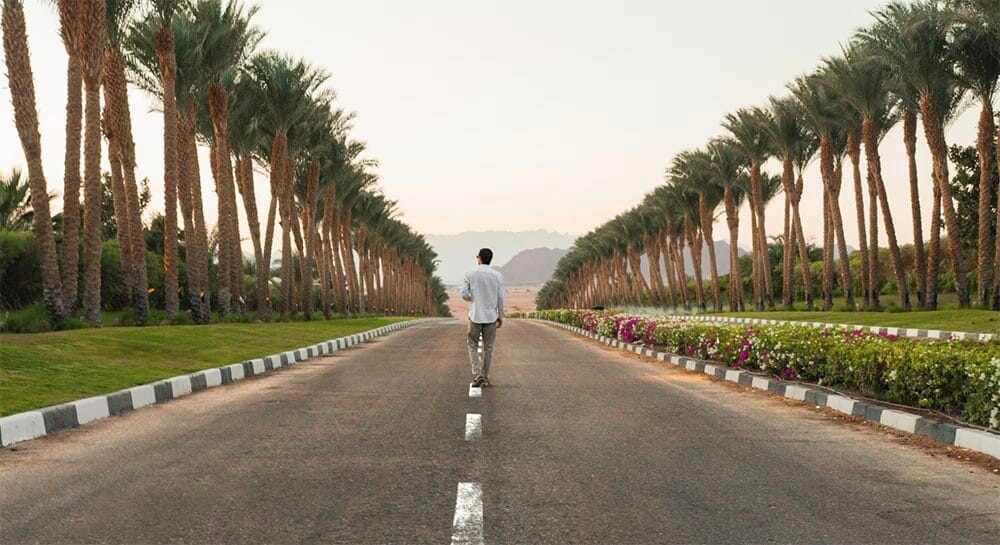
A long shot, also known as a wide shot, is a type of camera shot that captures a subject or scene from a distance, showing more of the surroundings and environment. This type of shot is often used in photography and cinematography to establish the setting, location, and context of the scene, and to give viewers a better understanding of the subject’s surroundings.
In a long shot, the subject appears relatively small in the frame, with more emphasis placed on the surrounding environment. This can be effective in providing viewers with a sense of scale and proportion or highlighting the subject’s position or movement within a larger setting.
Long shots are often used in landscape photography, architectural photography, and cinematography. Examples of long shots in photography include a city skyline, a mountain range, a beach scene, or a group of people in a large space.
Here are some tips for taking great long shots:
Use a tripod: When shooting from a distance, it’s important to keep your camera steady to avoid blurriness. A tripod will help you keep your camera stable and ensure sharp shots.
Plan your composition: Consider the framing and composition of your shot, including the subject, foreground, and background. Think about how you want to convey a sense of distance and perspective.
Pay attention to lighting: Good lighting is important for any shot, so take note of the time of day, and the direction of the light source, and adjust as necessary to avoid overexposure or underexposure.
Use a wide-angle lens: A wide-angle lens can help you capture more of the scene and convey a sense of scale and grandeur.
Experiment with different angles: Don’t be afraid to try different angles and perspectives to create interesting and dynamic shots.
Recommended lenses for long shots:
For capturing long shots, you typically want to use a lens with a longer focal length to achieve the desired magnification and compression of distance. Here are some recommended lenses for long shots:
Telephoto lenses:
These lenses have a longer focal length, typically 70mm and above, and can zoom in to capture distant subjects. They can also compress the perspective, making distant objects appear closer together. Examples include the Canon EF 70-200mm f/4L IS USM or the Nikon AF-S Nikkor 70-300mm f/4.5-5.6G VR.
Superzoom lenses:
These lenses have a wide zoom range, often ranging from wide-angle to telephoto focal lengths. They are versatile and can be useful when you need to quickly capture both wide and zoomed-in shots. Examples include the Tamron 18-400mm f/3.5-6.3 Di II VC HLD or the Sigma 18-300mm f/3.5-6.3 DC Macro OS HSM.
Wide-angle lenses:
Although not the most obvious choice for long shots, wide-angle lenses can be used to capture expansive landscapes or architecture from a distance. Examples include the Canon EF 16-35mm f/2.8L III USM or the Nikon AF-S Nikkor 14-24mm f/2.8G ED.
It’s important to keep in mind that the lens you choose will depend on the specific situation and the effect you want to achieve.
4. High-Angle Shot:
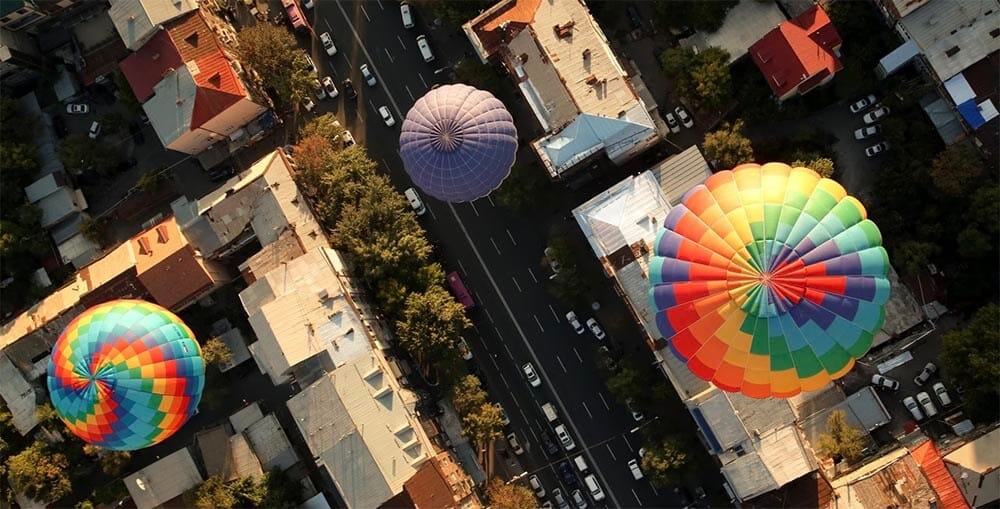
A high-angle camera shot is a type of camera angle where the camera is positioned above the subject, looking down at them. This type of shot is often used in photography and cinematography to create a sense of vulnerability, weakness, or inferiority for the subject by showing them from a higher position.
In a high-angle shot, the camera is positioned above the subject, pointing downward. This creates the impression that the viewer is looking down on the subject, which can be used to convey a sense of superiority or dominance. High-angle shots are often used in conjunction with low-angle shots, where the camera is positioned below the subject, to create contrast and to emphasize the power dynamics between the characters in the shot.
High-angle shots can be used in a variety of photography genres, including portrait, fashion, and documentary photography. Examples of high-angle shots in photography include a person lying down, a child looking up, a bird’s-eye view of a landscape, or a group of people from a balcony or rooftop.
Here are some tips for taking great high-angle shots:
Find a high vantage point: Look for a high location, such as a balcony, rooftop, or hilltop, that offers a good view of the subject from above.
Use a stable platform: When shooting from a high angle, it’s important to use a stable platform to prevent camera shake. You can use a tripod, monopod, or other stabilizing device to keep the camera steady.
Pay attention to lighting: Good lighting is essential for any type of photography, including high-angle shots. If shooting outdoors, try to shoot during the golden hour (the hour after sunrise or before sunset) to get a warm, soft light. If shooting indoors, use natural light or a diffused artificial light source to avoid harsh shadows.
Use a wide-angle lens: A wide-angle lens can help you capture more of the scene and give a sense of depth and scale to the image.
Look for interesting angles: Try experimenting with different angles and perspectives to create unique and visually interesting shots.
Use props or foreground elements: Including foreground elements or props in the shot can help add depth and interest to the image.
Consider the composition: Pay attention to the composition of the shot, and use the rule of thirds or other composition techniques to create a balanced and visually pleasing image.
Recommended lens for High-Angle Shots:
There are several lenses that can be used for high-angle shots, depending on the specific requirements and desired effect. Here are some recommendations:
Wide-angle lenses: Wide-angle lenses are perfect for capturing the full scene from a high angle. They can create a sense of depth and provide a broad perspective of the scene. Recommended focal lengths include 16-35mm or 24-70mm.
Telephoto lenses: Telephoto lenses can be used to capture high-angle shots from a greater distance, making them ideal for landscape photography. Recommended focal lengths include 70-200mm or 100-400mm.
Tilt-shift lenses: Tilt-shift lenses allow you to adjust the plane of focus, creating a unique perspective that is perfect for architectural or cityscape photography. Recommended focal lengths include 24mm or 45mm.
Ultimately, the best lens for a high-angle shot will depend on the specific situation and the desired effect. It’s always a good idea to experiment with different lenses to find the one that works best for your needs.
5. Low-Angle Shot:
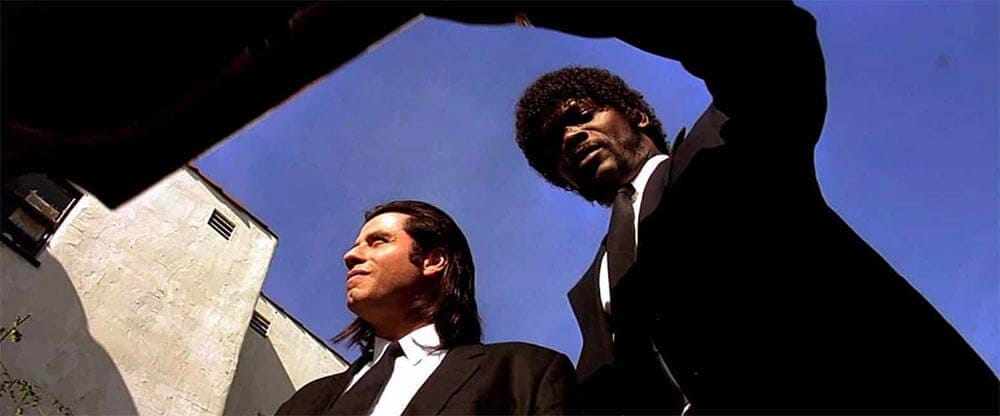
A low-angle camera shot is an angle where the camera is placed lower than the subject. This technique is used to create a sense of power, dominance, or importance for the subject in the frame, as it emphasizes their height, size, and impact. It can be used in different photography genres, such as portrait, landscape, or architecture, and also in filmmaking.
Examples of low-angle shots in photography include a skyscraper, a tall tree, a person standing, or an animal looking down. Low-angle shots can be achieved by placing the camera on a low tripod, on the ground, or by holding it low to the floor.
To capture a good low-angle shot, it’s important to pay attention to the lighting, framing, and composition.
Here are some tips for taking great low-angle shots:
Look for a strong subject: Find a subject that has height or dominance, such as a tall building, a person standing, or an animal looking down.
Get low: Place the camera at a low angle to the subject to emphasize their height and size.
Use a wide-angle lens: A wide-angle lens can help you capture more of the subject and the surrounding environment.
Pay attention to lighting: Use natural light or a diffused artificial light source to avoid harsh shadows and create a balanced exposure.
Frame the shot carefully: Use the rule of thirds or other composition techniques to create a visually pleasing and balanced shot.
Recommended lenses for Low-Angle Shot:
There are several lenses that can be used for capturing low-angle shots, depending on the specific needs and preferences of the photographer. However, wide-angle lenses are commonly used for this type of shot to emphasize the subject’s height and create a dramatic effect. A wide-angle lens with a focal length of 14-24mm or 16-35mm is ideal for capturing low-angle shots. These lenses can capture a wider field of view and add depth and dimension to the shot. Additionally, tilt-shift lenses can also be used to correct distortion and ensure that the lines in the image remain straight.
6. Dutch Angle Shot:
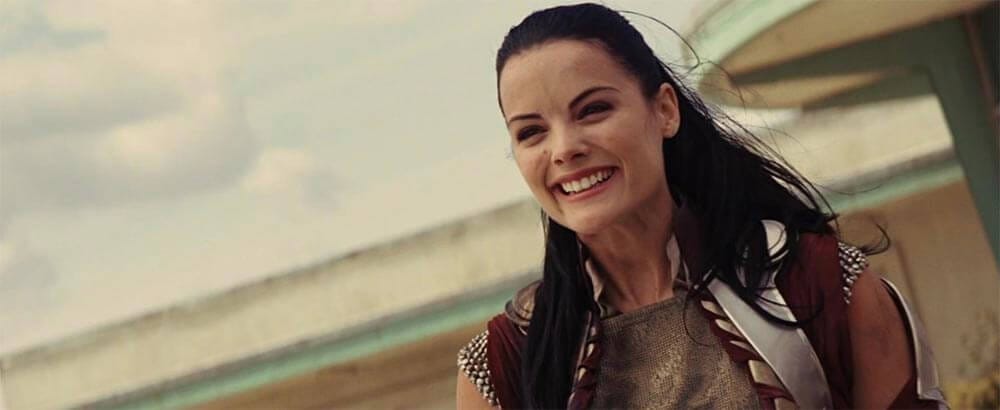
A Dutch angle camera shot, also known as a Dutch tilt or canted angle, is a camera technique where the camera is tilted to create a tilted or off-kilter appearance. This technique is used to create a sense of unease, tension, or disorientation for the viewer. It can be used in different photography genres, such as portrait, landscape, or cinematography.
Examples of Dutch angle shots in photography include a tilted landscape, a canted portrait, or a diagonal architecture. Dutch angle shots can be achieved by tilting the camera to one side or angling it diagonally.
To capture a good Dutch angle shot, it’s important to pay attention to the subject, framing, and composition.
Here are some tips for taking great Dutch angle shots:
Choose a subject with an interesting angle: Look for a subject that has strong diagonal or curved lines, which can be emphasized by the tilted camera.
Use the tilt to create tension or interest: The tilt should not be arbitrary but should add to the composition and storytelling of the shot.
Be careful not to overuse the technique: Overusing the Dutch angle can create a dizzying effect for the viewer and detract from the overall impact of the shot.
Play with the background: The background can help emphasize the tilt of the camera, such as by contrasting it with horizontal or vertical lines.
Experiment with different angles and degrees of tilt: Tilting the camera slightly can create a subtle effect, while a more extreme tilt can create a more dramatic effect.
Recommended Lenses for Capturing Dutch Angle Shots:
Wide Angle Lens: A wide-angle lens is ideal for capturing Dutch angle shots. It allows you to capture a large area while still maintaining a unique and creative perspective.
Tilt-Shift Lens: A tilt-shift lens is another option for capturing Dutch angle shots. It allows you to tilt the lens to create the desired angle while keeping the subject in focus.
Fisheye Lens: A fisheye lens can also be used to capture Dutch angle shots, providing a wide and distorted perspective.
Zoom Lens: A zoom lens can be used to adjust the focal length and capture a Dutch angle shot from a distance.
Prime Lens: A prime lens can provide sharper and more detailed images, making it ideal for capturing Dutch angle shots with high resolution and clarity.
7. Bird’s Eye View Shot:
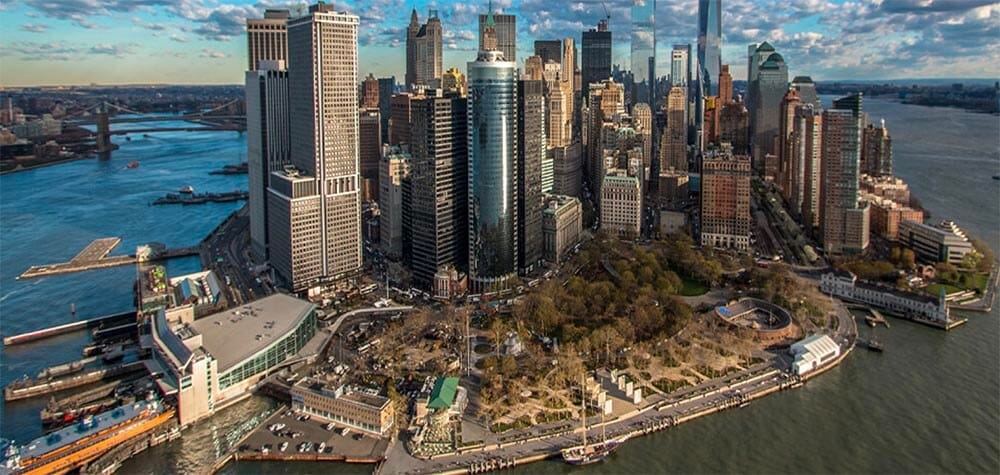
The bird’s eye view camera shot is a photography angle that captures a subject or a scene from directly above as if the camera is placed high up in the sky like a bird. This shot provides a unique and elevated perspective that can be used to show the entire scene or subject and their relationship to the surrounding environment. It can be used to create a sense of vastness or insignificance and is often used in landscape, architectural, and aerial photography.
Examples of bird’s eye view shots include aerial shots of cities, landscapes, and oceans, drone shots of buildings or structures, and shots taken from tall structures such as towers or mountains. This type of shot is becoming increasingly popular with the advancement of drone technology, allowing photographers to capture breathtaking views from previously impossible angles.
To take great bird’s eye view shots, it is important to have the right equipment, such as a drone or a tall platform, to elevate the camera to a high enough level. Planning the shot in advance and considering factors such as lighting, composition, and the surrounding environment can also help to create a visually stunning and impactful image.
Here are some tips for taking great bird’s eye view camera shots:
Choose the right equipment: You will need a drone or a high vantage point to capture a bird’s eye view shot. Make sure your equipment is stable and can handle the altitude.
Plan your shot: Think about the composition, lighting, and surrounding environment before you start shooting. This will help you capture the perfect shot.
Consider the weather: Shooting on a clear day will provide better lighting and visibility. However, cloudy or rainy days can create interesting and moody shots as well.
Use a wide-angle lens: A wide-angle lens will allow you to capture more of the scene and provide a greater sense of depth.
Experiment with angles: Try shooting at different angles to capture a unique perspective of the scene. Don’t be afraid to get creative!
Use manual mode: Shooting in manual mode will give you more control over the camera settings and allow you to adjust to the lighting conditions.
Edit your photos: Post-processing can help enhance the colors, contrast, and sharpness of your bird’s eye view shots. Experiment with different editing techniques to bring out the best in your images.
Recommended Lenses for Capturing Bird’s Eye View Shots:
Some recommended lenses for Bird’s Eye View shots include wide-angle lenses with a focal length of 10-24mm, fisheye lenses with a focal length of 8-15mm, and drones with high-resolution cameras.
8. Worm’s Eye View Shot:
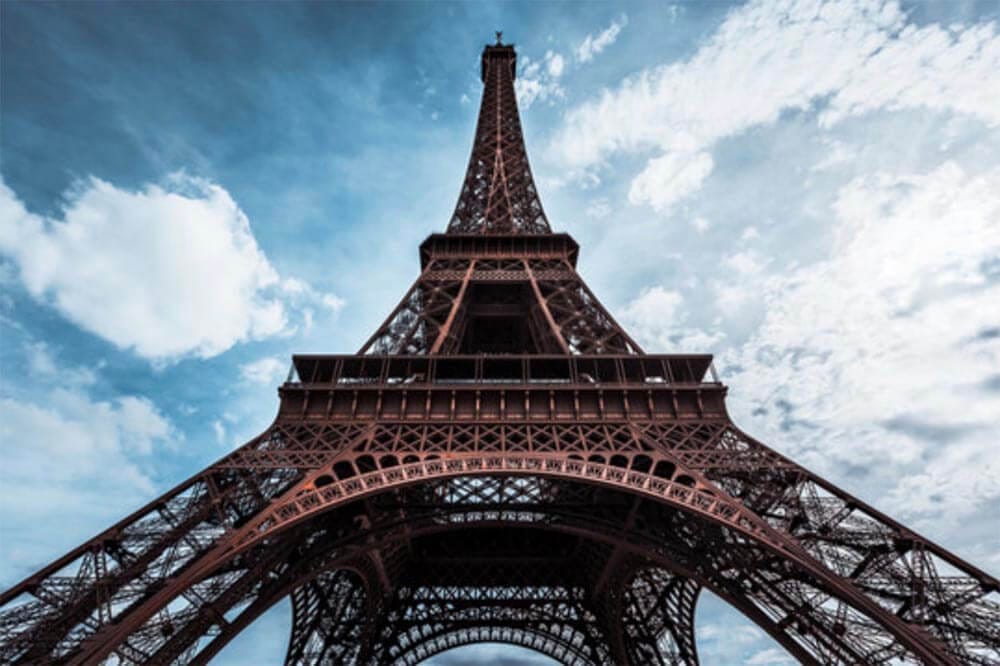
The Worm’s Eye View Shot is a photography technique that captures the subject from a very low angle, often from the ground level. This type of shot creates a sense of power, dominance, and superiority for the subject by showing them from a low position. It can also create a sense of drama and tension, especially when combined with a wide-angle lens.
Examples of Worm’s Eye View Shots in photography include a tall building or skyscraper, a tree or a plant, a person standing or sitting, or any object that is towering over the camera.
The Worm’s Eye View Shot is often used in architectural, urban, and street photography to create a unique and interesting perspective. It can also be used in portrait photography to make the subject look larger than life or to create a sense of intimidation or fear.
To take a great Worm’s Eye View Shot, you can try the following tips:
Get low: Position your camera at or near ground level to capture the subject from a low angle.
Use a wide-angle lens: A wide-angle lens can help you capture more of the subject while also adding a sense of distortion and drama to the image.
Pay attention to the background: Since the background will be visible in the shot, make sure it complements the subject and adds to the overall composition.
Experiment with different perspectives: Try shooting from different angles and positions to find the best composition and perspective for your shot.
Use natural light: Natural light can create a warm and dramatic effect in Worm’s Eye View Shots, so try shooting during the golden hour or in other favorable lighting conditions.
Recommended Lenses for Capturing Worm’s Eye View Shots:
Some recommended lenses for Worm’s Eye View shots include ultra-wide-angle lenses with a focal length of 10-24mm, fisheye lenses with a focal length of 8-15mm, and tilt-shift lenses with a focal length of 17mm.
9. Over-the-Shoulder Shot:
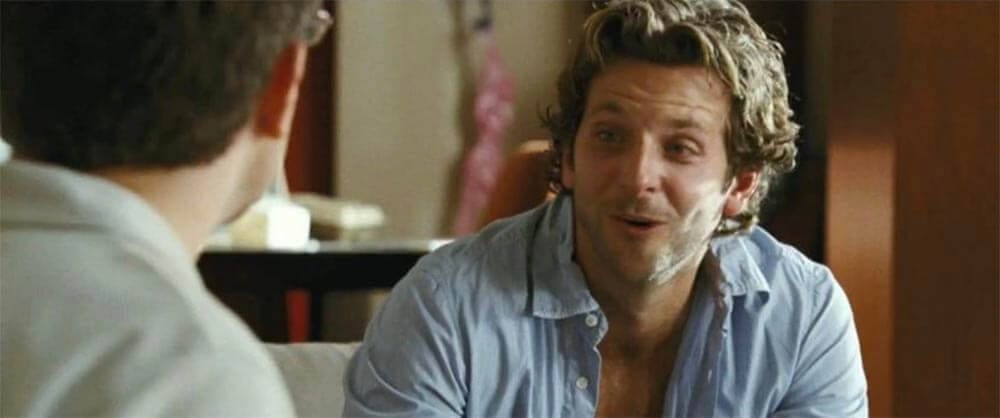
An over-the-shoulder shot is a camera angle commonly used in film and photography that shows one character from behind the shoulder of another character. The camera is positioned behind one character and captures the back of their head, shoulder, and part of their body, while also including a portion of the face and body of the character in front.
This shot is frequently used in dialogue scenes to provide a sense of perspective and spatial relationships between characters. It helps the viewer to understand the character’s point of view and emotional reaction to the conversation.
Over-the-shoulder shots are also used in scenes with action and movement, providing a sense of dynamic energy while still maintaining the visual focus on the primary character.
Here are some tips for taking a great over-the-shoulder camera shot:
Frame the shot carefully: When framing the shot, ensure that the character in the foreground is not blocking the character in the background. The character in the foreground should be positioned slightly off-center to give a clear view of the character in the background.
Consider the background: Make sure that the background is interesting and adds to the story. The background should not be distracting or take away from the main subject.
Pay attention to lighting: Ensure that the lighting is consistent across both characters and that there are no harsh shadows or reflections that could detract from the shot.
Use a shallow depth of field: Using a shallow depth of field can help to blur the background and put more emphasis on the character in the foreground.
Maintain continuity: It is essential to maintain continuity in the shot when shooting over-the-shoulder shots. This means keeping the camera angle and framing consistent throughout the scene.
Take multiple shots: To ensure you capture the best shot, take multiple shots from different angles and adjust the framing and focus as needed. This will give you more options to choose from during the editing process.
Recommended lenses for the shoulder shot:
The recommended lenses for an over-the-shoulder shot depend on the desired framing and depth of field.
For a standard over-the-shoulder shot in which the subject’s face is in focus, a prime lens with a focal length between 50-85mm is often used. Examples of lenses that can work well for this shot include the Canon EF 50mm f/1.8 STM or the Nikon AF-S FX NIKKOR 85mm f/1.8G.
If you want to capture more of the environment or include multiple subjects in the shot, a wider lens such as a 35mm or 24mm can be used. The Canon EF 35mm f/1.4L II USM or the Sony FE 24mm f/1.4 GM are good options for this type of shot.
In general, lenses with wide apertures (low f-stop numbers) are useful for isolating the subject and creating a blurred background, while lenses with smaller apertures can be used to create more depth of field and keep the entire shot in focus.
10. Panning Shot:
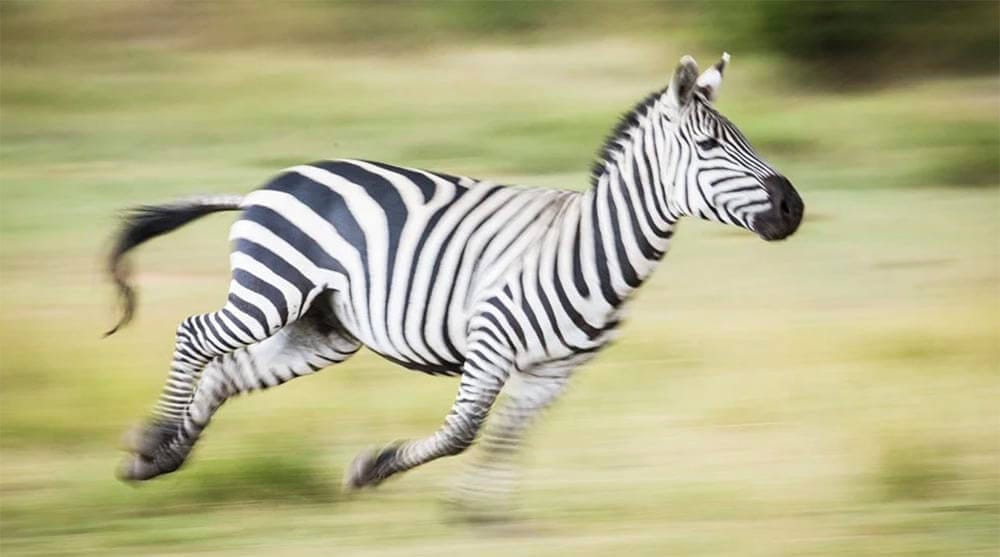
A panning shot is a camera technique that involves moving the camera horizontally along with a moving subject, creating a sense of motion and action in the resulting photograph or video. The camera moves with the subject while keeping it in focus, allowing the viewer to follow the movement of the subject within the frame.
Panning shots are commonly used in sports and action photography to capture fast-moving subjects such as athletes, cars, or wildlife. They can also be used in filmmaking to create a sense of movement or to track a character’s movement through a scene.
To take a successful panning shot, it is important to use a slow shutter speed and to keep the camera steady as you move it. A tripod or monopod can be helpful in keeping the camera stable. It is also important to keep the moving subject in the same part of the frame throughout the shot to maintain focus and to create a smooth motion blur in the background. With practice, you can capture dynamic and exciting images using the panning technique.
Here are some tips to take great panning shots:
Use a slower shutter speed: To capture motion blur and convey the sense of movement in the shot, use a slower shutter speed. Start with a shutter speed of around 1/30th of a second and adjust as necessary.
Follow the subject: Keep the camera moving smoothly with the subject, tracking their movement as they move across your field of view. This will create a sense of motion and give the viewer a feeling of being a part of the action.
Use continuous focus: Set your camera to continuous focus mode to help keep your subject in sharp focus as they move through the frame.
Anticipate the movement: Panning shots require a bit of anticipation. Try to predict where the subject will be in the frame when you take the shot and start tracking them a bit before they get there.
Practice, practice, practice: Panning shots take practice to get right. Experiment with different shutter speeds, movements, and subjects to find what works best for you.
Remember, the key to a great panning shot is to convey a sense of motion and action. With practice and patience, you can capture stunning images that bring your subjects to life.
Recommended lenses for great panning shots:
To capture great panning shots, you need to use a lens with a focal length that suits the subject’s speed and distance from the camera. The ideal lens for panning shots would have a longer focal length, around 70-200mm, as it will allow you to capture the subject’s motion while keeping the background blurred.
Here are some recommended lenses for capturing great panning shots:
Canon EF 70-200mm f/2.8L IS III USM: This lens is perfect for sports and action photography. It has a fast aperture of f/2.8, which allows for faster shutter speeds and excellent low-light performance.
Nikon AF-S NIKKOR 70-200mm f/2.8E FL ED VR: This lens is designed for high-speed sports, action, and wildlife photography. It has a fast f/2.8 maximum aperture, which allows for shallow depth of field and faster shutter speeds.
Sony FE 70-200mm f/2.8 GM OSS: This lens is designed for Sony full-frame mirrorless cameras and is ideal for sports and action photography. It has a fast f/2.8 maximum aperture and optical image stabilization for sharper images.
Tamron SP 70-200mm f/2.8 Di VC USD G2: This lens is compatible with Canon and Nikon DSLRs and is ideal for sports and wildlife photography. It has a fast f/2.8 maximum aperture and image stabilization for sharp images.
Sigma 70-200mm f/2.8 DG OS HSM Sports Lens: This lens is compatible with Canon, Nikon, and Sony cameras and is ideal for sports and wildlife photography. It has a fast f/2.8 maximum aperture and image stabilization for sharp images.
11. Zoom Shot:
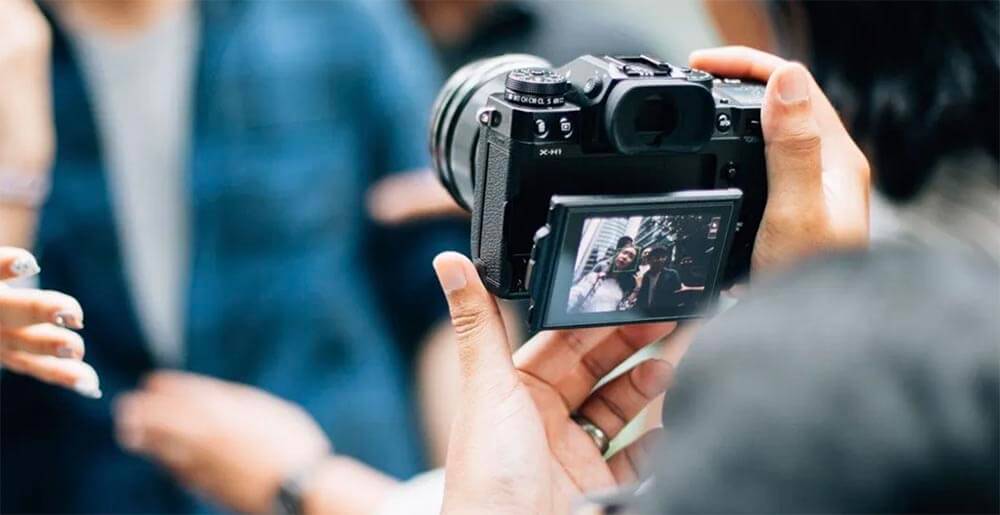
A zoom shot is a camera technique where the focal length of the lens is changed during the shot, making the subject appear closer or farther away. Unlike moving the camera closer or further away from the subject, a zoom shot keeps the camera stationary while adjusting the lens, which can create a different visual effect.
Zoom shots are used in a variety of contexts, such as movies, television, and photography. They can be used to emphasize an object or person in the scene, create a sense of drama or suspense, or provide a different perspective on a subject.
There are two types of zoom shots: zoom-in and zoom-out. The zoom-in brings the viewer closer to the subject, while the zoom-out takes the viewer further away. In addition, the speed of the zoom can also affect the overall effect of the shot. A slow zoom can create a more dramatic and intense effect, while a fast zoom can be used to create a feeling of urgency or excitement.
To take a great zoom shot, it’s important to have a good quality lens that allows for smooth and precise zooming. A zoom lens with a variable focal length, such as a 24-70mm or 70-200mm, is recommended for this type of shot. It’s also important to practice and experiment with different zoom speeds and angles to achieve the desired effect.
Here are some tips to take a great zoom shot:
Use a tripod: A tripod can help keep your camera steady while zooming in, ensuring that your shot is in focus and not shaky.
Start wide: Begin by zooming out to capture the subject in its entirety before slowly zooming in for a closer shot. This technique adds context and can help tell a story.
Use a smooth zoom: Make sure to zoom in or out smoothly to avoid any jarring camera movements that may distract the viewer.
Use manual focus: If possible, use manual focus while zooming to ensure the subject remains in focus throughout the zoom.
Experiment with different zoom speeds: Depending on the shot and the effect you want to achieve, you may want to experiment with different zoom speeds. A slow zoom can create a dramatic effect, while a fast zoom can add excitement and energy to the shot.
Plan your shot: Think about what you want to capture in your shot and plan your zoom accordingly. This can help you achieve a more professional-looking result.
Consider using a zoom lens: A zoom lens allows you to quickly and easily adjust your focal length, giving you more flexibility to capture different shots.
Recommended lenses for great zoom shots:
In photography, a zoom lens is a popular choice for achieving a zoom shot. Zoom lenses come with variable focal lengths that allow you to adjust the lens to achieve different magnifications of your subject.
A popular choice for zoom shots is a telephoto zoom lens, such as a 70-200mm or 100-400mm lens. These lenses allow you to zoom in and capture distant subjects, such as wildlife, sports, or events. They also offer a shallow depth of field, which can help to isolate the subject from the background and create a pleasing bokeh effect.
Another option for zoom shots is a standard zoom lens, such as a 24-70mm or 18-55mm lens. These lenses offer a more versatile range of focal lengths, allowing you to capture a variety of subjects at different distances. They are also typically lighter and more affordable than telephoto zoom lenses.
Ultimately, the choice of lens for a zoom shot will depend on your shooting style, the subject you want to capture, and your budget.
Suggested article >>

