
You’ve made a significant investment in product photos to showcase your clothing line, but how can you ensure these images drive sales without inadvertently compromising your profits? Often, seemingly minor issues can have a significant impact. You may encounter challenges such as lackluster garment colors on the screen, even though the clothing looked impeccable during the shoot. Alternatively, you might suddenly notice fabric wrinkles that weren’t apparent before.
The key to success lies in a strategic approach to photo editing. Whether you choose to handle the editing yourself or delegate it to professional editors, it’s crucial to know what to focus on to prepare your clothing shots for e-commerce success.
The Significance of Editing in Clothing Photography:
Post-processing plays a crucial role in presenting apparel products online, even when the garments are perfectly styled and well-lit. Raw photos straight from the camera often fail to do justice to the products. This is why small editing adjustments can significantly enhance the shopping experience for online consumers. Providing a realistic depiction of the clothing they intend to purchase allows them to make informed decisions, ensuring the items not only look great but also fit well.
There are several common editing tasks that brands typically need to perform on apparel photos:
- Color Correction: Ensuring that the color of the product in the image matches its real-life tone. For example, a red dress or a blue shirt should appear in the photo just as they do in reality.
- Brightness and Clarity Enhancement: Adjust the photo to be clear and bright enough so that both desktop and mobile shoppers can easily view the product and zoom in to closely examine its details.
- Wrinkle Removal: Eliminating wrinkles on the clothing that couldn’t be smoothed out during the photoshoot due to the model’s movement or other factors. This helps present the product in its best possible condition.
- Stain Removal: Addressing any accidental stains that may have occurred during the photoshoot. This ensures that the product appears pristine and appealing to potential buyers.
In essence, the goal of these post-processing edits is to create crisp, clean, and professional photos that align with the brand’s image and make their clothing products more enticing to online shoppers. These adjustments not only enhance the visual appeal but also contribute to a more accurate representation of the products, instilling confidence in consumers that they are making the right choice when purchasing online.
1. Clipping path and background removing service:
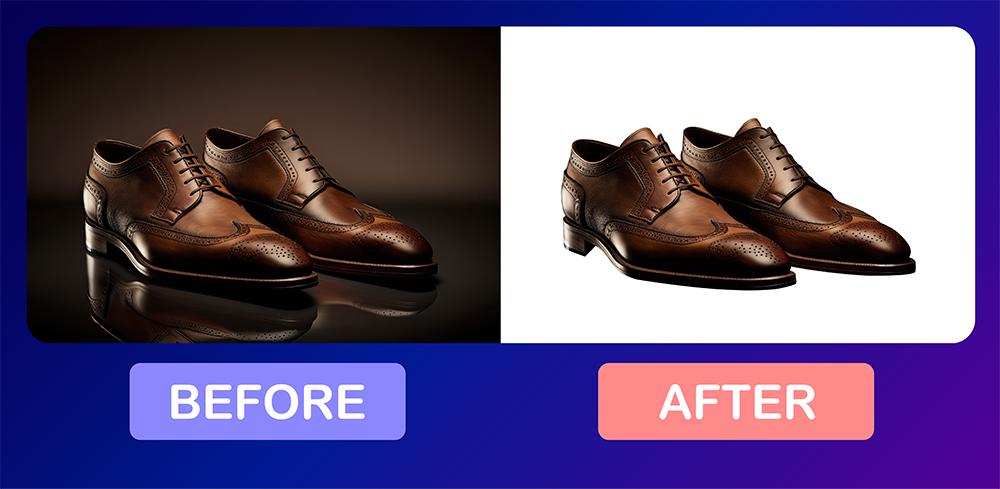
E-commerce sellers, especially those operating on leading platforms like Amazon and eBay, consider pure white backdrops an absolute necessity for their product images. These platforms have stringent requirements mandating the use of white backgrounds, primarily for the sake of uniformity and a consistent shopping experience for customers.
However, the significance of employing white backgrounds goes well beyond mere compliance with platform regulations. White backdrops serve as a powerful visual tool for enhancing the presentation of garments and other products, regardless of whether they are photographed on models or displayed individually.
key benefits of white backdrops
One of the key benefits of white backdrops is their ability to make products truly stand out. The stark contrast between the product and the pure white background draws the viewer’s attention directly to the item being showcased. This minimalist approach reduces distractions and allows potential buyers to focus entirely on the product’s details, design, and features.
Furthermore, the practice of removing the background entirely from product images offers a world of creative opportunities for sellers. With the background removed, sellers can experiment with various backgrounds, such as transparent ones that seamlessly blend with the website’s custom color scheme. This customization not only adds a unique touch to product listings but also creates a cohesive and branded look for the entire online store.
Some brands even choose to deviate slightly from the purest white, opting for a subtly darker shade of white as their backdrop. This choice, exemplified by the sustainable fashion brand People Tree, helps individual product listings stand out within the context of a predominantly white online store. It adds a touch of distinction while maintaining a clean and professional aesthetic.
In essence, pure white backdrops are essential tools for e-commerce sellers, as they serve a dual purpose. They meet platform requirements, ensuring that product listings are compliant and consistent. Simultaneously, they provide a canvas that amplifies the visual appeal of products, allowing for creativity and customization that can significantly impact the success of online sales. Whether it’s about adherence to standards or enhancing product presentation, white backdrops play a pivotal role in the world of e-commerce.
2. Add shadows for depth
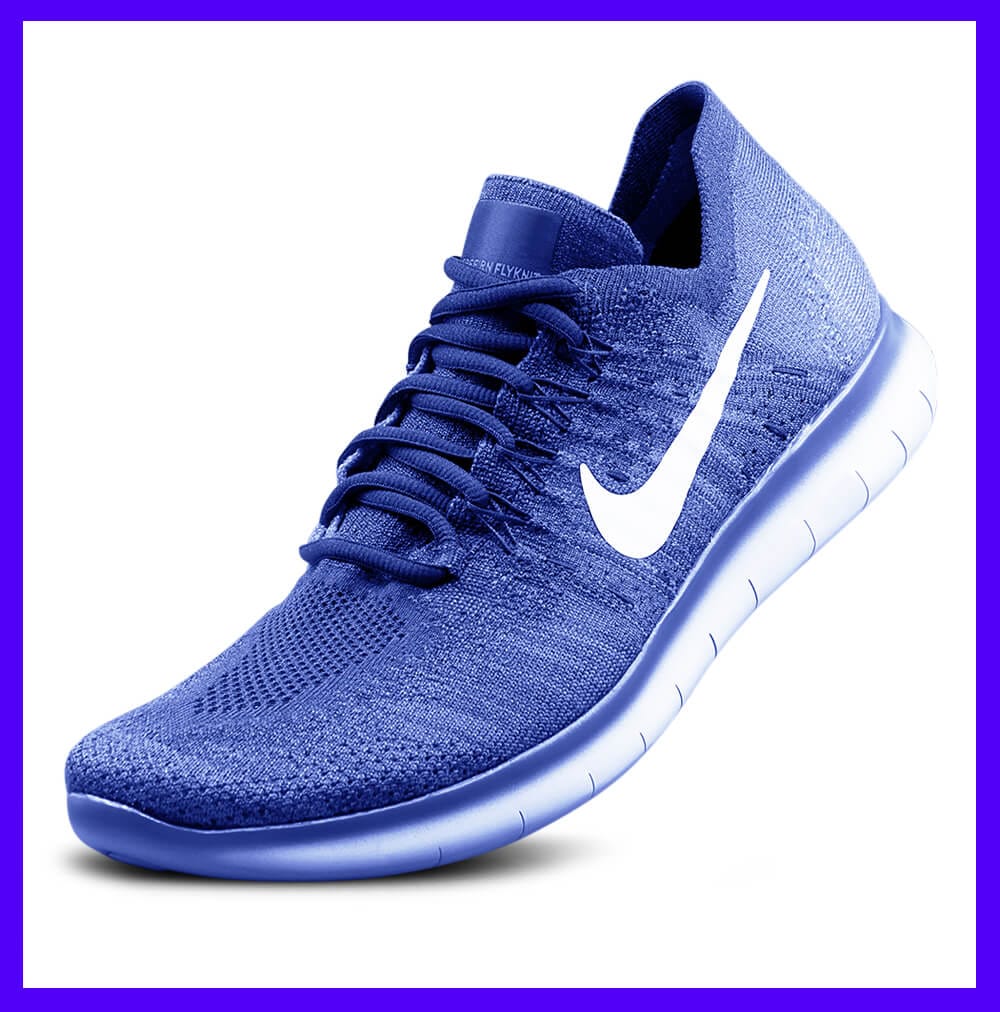
Indeed, incorporating a subtle shadow into cut-out clothing photos on a plain white background can significantly enhance their appeal and lend a more natural and engaging appearance. This technique not only meets the requirements of e-commerce marketplaces but also adds depth and realism to the product presentation.
Here’s a detailed explanation of the benefits and process of adding shadows in post-production:
When clothing photos are placed against a plain white background, they can sometimes appear flat and lacking in dimension. This is where the addition of a subtle shadow comes into play. By strategically incorporating a shadow during post-production, sellers have precise control over its direction and intensity, irrespective of the lighting conditions during the initial photo shoot.
This approach offers several advantages:
- Enhanced Realism: Shadows introduce a sense of depth and realism to the product image. They create the illusion that the garment is not floating in space but rather resting on a surface, which makes it more relatable and tangible to viewers.
- Creative Control: Adding shadows in post-production allows for creative freedom. Sellers can experiment with different shadow angles and intensities to achieve the desired visual effect. This flexibility ensures that the shadow complements the garment and the overall composition.
- Simplified Photoshoot: By decoupling the shadow creation process from the photoshoot itself, sellers can focus entirely on capturing the clothing with the right composition and lighting. They don’t need to worry about achieving the perfect shadow on set, which can be challenging due to varying lighting conditions.
- Marketplace Compliance: E-commerce platforms often have specific requirements regarding the use of shadows or reflections. Adding shadows in post-production ensures full compliance with these guidelines while maintaining a consistent and professional look.
In summary, incorporating subtle shadows in post-production for cut-out clothing photos on a white background is a smart strategy. It enhances the overall visual appeal and realism of the images, aligns with marketplace requirements, and offers the flexibility to fine-tune the shadow’s appearance for optimal results. This approach allows sellers to focus on capturing the clothing’s best qualities during the photoshoot and then add the finishing touch in the editing process.
3. Smooth wrinkles
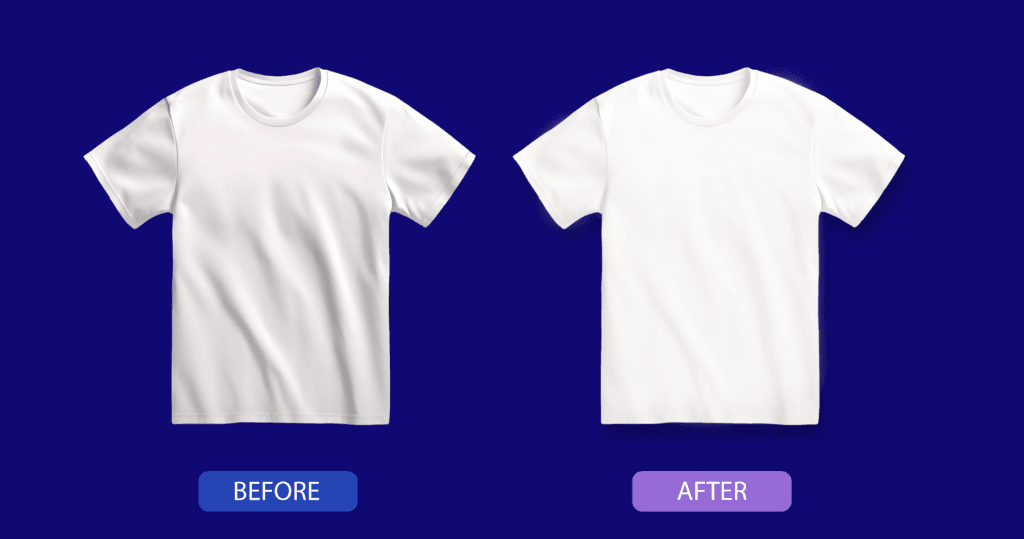
One of the most glaring signs of unprofessionalism in clothing photos is the presence of wrinkles on the garments. Despite meticulous steaming or ironing, wrinkles can often persist. Ensuring that your photos are wrinkle-free before uploading them to your online store is essential. However, in cases where wrinkles are unavoidable, you can employ post-processing techniques in Photoshop to rectify the issue.
Here’s a smart explanation of these Photoshop methods for wrinkle removal:
- Spot Healing Brush: To address fabric wrinkles, start by zooming in closely to the affected areas in your photo. Then, select the Spot Healing Brush tool in Photoshop. With this tool, you can “paint” over the wrinkles, allowing the software to intelligently replace them with pixels from nearby regions. This process effectively erases the wrinkles, leaving the garment looking smooth and pristine.
- Clone Stamp Tool: Another method for wrinkle removal involves using the Clone Stamp tool. First, identify a wrinkle-free section of the garment that closely matches the color and lighting of the wrinkled area. Then, hold down the ALT key (OPTION on Mac) to copy this wrinkle-free portion. Afterward, you can use the Clone Stamp tool to “paint” over the wrinkles with the copied texture, effectively covering them up. This technique ensures that the garment appears flawless and without any distracting creases.
By employing these post-processing methods in Photoshop, you can elevate the overall professionalism of your clothing photos, ensuring that your products are presented in the best possible light on your online store. These techniques enable you to tackle wrinkles and imperfections, resulting in polished and appealing product images that resonate with potential buyers.
4. Remove stains and other imperfections
Imperfections like stains, dust, and stray hairs on clothing can be an unavoidable challenge in product photography. While certain imperfections, such as sweat or droplets, can add a touch of realism to specific photos, they may not always align with the polished presentation desired by customers. In the example provided, the unedited photo on the left offers a genuine representation, complete with stains in their natural context. However, for the purpose of enhancing the t-shirt’s appeal in an e-commerce setting, the version on the right underwent editing to remove these damp marks while still maintaining the outdoorsy ambiance.
Addressing these imperfections typically involves straightforward post-processing techniques. The choice of tool depends on the size and nature of the imperfection you intend to correct. Two commonly used tools are the Spot Healing Brush and the Clone Stamp. The Spot Healing Brush is effective for seamlessly eliminating smaller imperfections, while the Clone Stamp allows for more precise control, particularly when copying and replicating patterns or textures.
For more substantial imperfections or when greater control over the resulting texture or pattern of the garment is required, the Patch Tool can be a valuable resource. You can find comprehensive tutorials on platforms like YouTube that demonstrate how to use this method effectively.
By implementing these editing techniques, you can enhance the overall appearance of your clothing products. You’ll be able to remove unwanted imperfections while preserving the essential aesthetic and appeal of the garments. This meticulous attention to detail ensures that your e-commerce product images maintain a high level of visual quality and professionalism, enhancing their ability to resonate positively with potential customers and drive sales.
5. Color correct
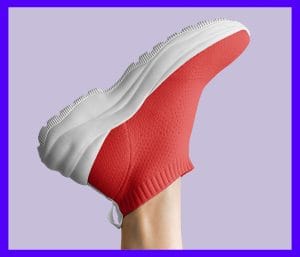
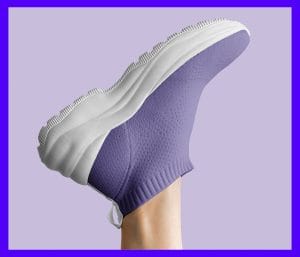
Natural light can introduce a range of unexpected color nuances to your studio-shot clothing photos, often capturing subtleties that the human eye might overlook. These variations can result from a variety of factors, including the presence of ambient light sources in your studio, the time of day you shoot (such as daylight or golden hour), and the unique characteristics of your camera’s sensor.
To remedy these discrepancies and present your clothing products in their true colors, Adobe Lightroom provides an array of powerful post-processing tools. Here’s a comprehensive guide on how to utilize Lightroom to achieve accurate color representation:
1. Brightness Adjustment:
Before diving into color correction, it’s essential to ensure that your photo has the appropriate brightness level. Lightroom offers the Exposure slider, which allows you to fine-tune the overall brightness of your image, helping to establish a solid foundation for subsequent adjustments.
2. Correcting Color Temperature and Tint:
- Pre-built White Balance Presets: Lightroom simplifies the process with pre-built White Balance presets. These presets are tailored to various shooting conditions. For instance, if you captured your image under natural light, you can select presets like Daylight, Cloudy, or Shade. When chosen, these presets automatically adjust the temperature and tint settings to harmonize with the selected condition, bringing the colors closer to their actual appearance.
- White Balance Selector: Lightroom’s pipette tool, represented by an icon, offers another precise method. By clicking on a neutral-color area within your image (white, gray, or black), you instruct Lightroom to adjust the temperature and tint based on your selection. This approach strives to recreate a natural and well-balanced color palette. If the initial result falls short, you can repeat the selection process until you achieve a more accurate outcome.
- Manual Temperature and Tint Adjustment: When absolute precision is necessary, you have the option to manually manipulate the temperature and tint sliders in Lightroom. This hands-on approach empowers you to meticulously fine-tune these settings, ensuring that the colors of your clothing products match their true shades precisely.
These meticulous post-processing techniques in Adobe Lightroom empower you to rectify color discrepancies and present your clothing items authentically. By addressing the effects of natural light variations and other factors, you can ensure that your e-commerce product images accurately depict your garments, making them more appealing and reliable to potential customers. This attention to detail in post-production enhances the professionalism and quality of your online product listings.
6. Create a lifestyle composite
Integrating lifestyle context into your product images is a powerful way to make your offerings more relatable and appealing to potential customers. While traditional photoshoots with hired models and specific locations can undoubtedly yield stunning results, they can also be quite expensive, especially if you only require a limited number of lifestyle shots. This is where the concept of lifestyle composites comes into play.
Lifestyle composites offer a cost-effective and efficient alternative to traditional photoshoots. The process involves taking an existing product or subject photo, removing its background, and seamlessly integrating a new background, which can be either a stock photo or an image you’ve captured yourself, during the post-processing stage. This method enables you to swiftly create compelling lifestyle photos without the complexities and budgetary considerations associated with organizing an entire photoshoot.
Here’s a more detailed breakdown of the steps involved in creating lifestyle composites:
- Initial Product Photo: Begin with a simple product photo that serves as your starting point. This can be an image featuring a model wearing one of your garments, for instance.
- Background Removal: If the background hasn’t already been removed from the initial photo, this step involves meticulously isolating the product or subject by eliminating the existing background.
- Background Replacement: The heart of the composite process lies in seamlessly integrating a suitable background into the edited product or subject image. You can choose from stock photos that match your desired context or capture your background image, depending on your requirements.
- Attention to Detail: Achieving a convincing composite demands a keen eye for detail. Make sure that the product or subject appears as though it naturally belongs in the new backdrop. Pay particular attention to aspects like creating realistic shadows, precise cut-outs, and accurate sizing to ensure a seamless blend.
- Color Adjustment: Given that the lighting conditions may differ between the initial product photo and the chosen background, color adjustments are often necessary to harmonize the two elements. This step ensures that the composite doesn’t appear artificial and disjointed.
- Versatility: One of the most compelling advantages of lifestyle composites is their versatility. You can reuse the same product image with various backgrounds, providing you with a dynamic library of lifestyle shots without the need for repeated photoshoots.
While lifestyle composites may demand more advanced editing skills or the support of experienced photo editors, they offer a valuable solution for businesses seeking to infuse lifestyle context into their product images without breaking the bank. Many professional product photography studios and skilled editors specialize in providing this advanced service, making it accessible and efficient for businesses looking to enhance their visual content and engage their target audience with captivating lifestyle imagery.
7. Add or remove brand tag
Clothing labels and tags that protrude from garments can indeed be distracting in product photos. In some cases, you might want to remove these tags during post-processing to create a cleaner and more polished look for your product images. Alternatively, you may want to add or modify the existing brand tag on a clothing item that has already been photographed. Here’s a brief overview of these two scenarios:
Removing Distracting Labels and Tags:
In the world of e-commerce, where first impressions are paramount, it’s essential to present your clothing products in the most visually appealing and distraction-free manner possible. Clothing labels, tags, or care instructions that protrude or stand out can detract from the overall presentation, drawing attention away from the garment itself.
Post-processing tools, such as Adobe Photoshop, offer powerful solutions for addressing this issue. These tools allow you to delicately remove distracting labels and tags while maintaining the garment’s integrity. The Clone Stamp and Healing Brush tools, for instance, enable you to seamlessly blend the area where the label or tag was, creating a clean and unobstructed product image. By skillfully editing out these distractions, you can ensure that your customers’ focus remains squarely on the clothing’s design, features, and quality.
Adding or Altering Brand Tags:
Customization plays a vital role in branding and marketing. There may be instances where you want to add or modify brand tags on clothing items to better align them with your brand’s identity or to convey a specific message or promotion.
Digital editing tools, such as Adobe Illustrator or Photoshop, empower you to craft or alter brand tags with precision and creativity. Whether you need to insert your brand logo, adjust the tag’s color scheme, or include promotional messaging, these software applications offer the flexibility to design the perfect tag for your needs.
When digitally incorporating or altering brand tags, meticulous attention to detail is paramount. Factors like color accuracy, size, and placement must be considered to ensure that the digital tag seamlessly integrates with the clothing image. By carefully attending to these elements, you can achieve a cohesive and professional appearance, reinforcing your brand’s identity and messaging.
In essence, the art of post-processing for clothing product images goes beyond mere correction and enhancement. It extends to the realm of customization, enabling you to refine and tailor your images to match your brand’s vision and marketing objectives. Whether you’re removing distracting labels or adding and altering brand tags, these post-processing techniques contribute to creating visually captivating and brand-consistent product images that resonate with your target audience and drive engagement and sales.
8. Remove hangers
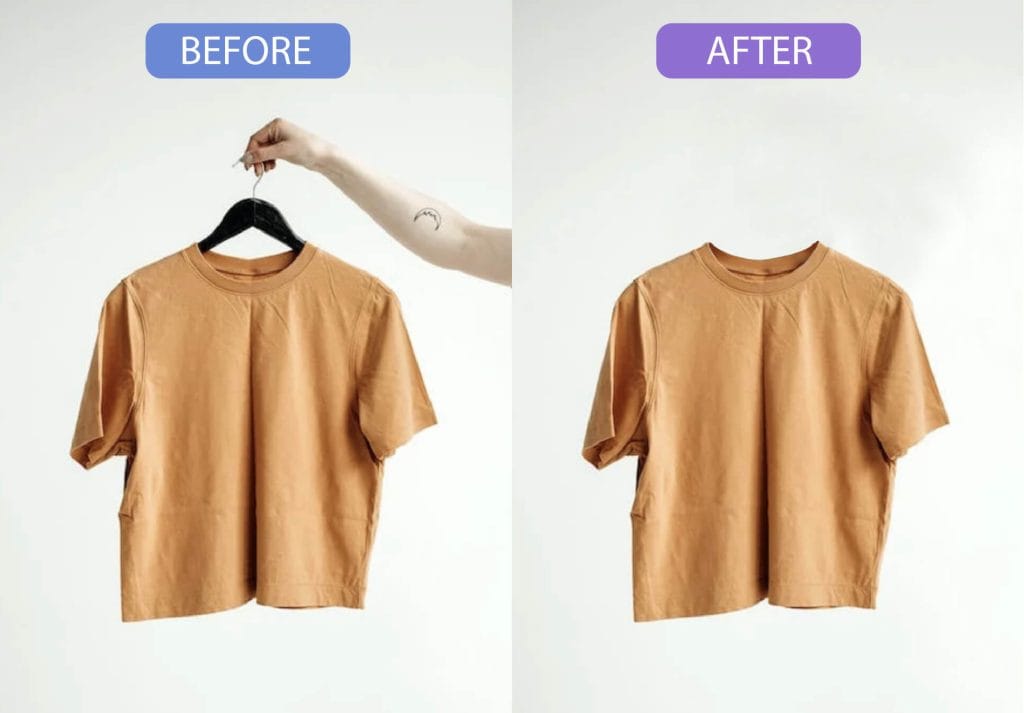
Absolutely, not having the ideal setup to hang clothing items during a photoshoot shouldn’t deter you from capturing high-quality product images. You can still achieve great results by photographing the garments while they’re held and then removing any hands, hangers, or arms during post-processing. This technique is similar to the process of removing imperfections and can yield professional-looking product images. Here’s a breakdown of this approach:
- Photographing the Garments: Begin by taking photos of the clothing items while they are held or worn. You can use a mannequin, or model, or simply hold the garment yourself to achieve the desired look and fit. Make sure to capture multiple angles and variations to showcase the product effectively.
- Background Removal: After the photoshoot, proceed to remove the background from the images. This step isolates the clothing item from any hands, hangers, or arms that might be visible in the original shots. Tools like the Background Eraser or Magic Wand in software like Adobe Photoshop can be handy for this purpose.
- Post-Processing Cleanup: Once the background is removed, you can proceed with the post-processing cleanup. This involves meticulously editing out any remaining elements that you don’t want in the final product image. For instance, you can use the Clone Stamp tool to clone nearby areas over any visible hands or arms, creating a seamless and natural appearance.
- Final Touches: After removing unwanted elements, make any necessary adjustments to the image to ensure that the garment looks its best. This can include color correction, contrast enhancement, and any other post-processing refinements to achieve a polished and professional look.
By following this approach, you can produce product images that showcase your clothing items effectively, without the need for an elaborate setup or additional equipment. The post-processing stage allows you to fine-tune the images, ensuring that the focus remains squarely on the garments themselves. This technique is particularly useful when you want to maintain a consistent and clean visual style for your online store or catalog.
9. Create a ghost mannequin shot
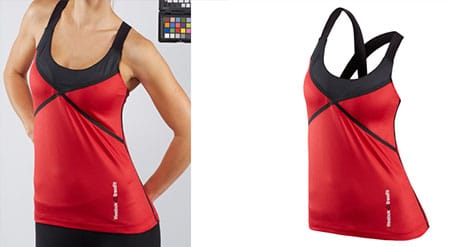
Ghost mannequin service | We can handle any kind of ghost mannequin editing very precisely and within the shortest possible time. | Clipping Path Source
Creating ghost mannequin shots is a compelling technique to showcase clothing items that go beyond simply removing hangers and ensuring garments maintain their shape. This method gives the illusion that the clothing is worn by an invisible model or mannequin, allowing it to retain its form while appearing as if it’s being worn. Ghost mannequin shots provide a more realistic and appealing representation of clothing compared to photos taken with garments on hangers. Here’s a concise guide on how to use ghost mannequin images effectively for your brand:
Creating Ghost Mannequin Shots:
When traditional methods of showcasing clothing, such as displaying them on hangers, fall short in conveying the product’s fit and style, ghost mannequin photography comes to the forefront. This technique involves creating the illusion that the clothing is worn by an invisible model or mannequin. While it does require additional planning and post-processing, the results can be exceptionally compelling.
Key Considerations:
- Planning: Successful ghost mannequin shots necessitate careful planning. You’ll need to shoot the clothing both on a mannequin or model and separately without anyone wearing it. Ensure that the garments fit snugly on your chosen model or mannequin to highlight their form accurately.
- Minimalistic Approach: Contrary to a full-fledged photoshoot, you won’t need an extensive number of photos for ghost mannequin shots. A few well-composed shots from various angles, focusing on essential details like the front, back, and interior labels, will suffice.
Post-Processing for Ghost Mannequin Shots:
- Image Editing: The magic of ghost mannequin shots unfolds during the post-processing phase. Skilled image editors employ their expertise to merge the images of the clothing on a mannequin or model with those of the empty garments. This delicate process aims to seamlessly blend the two sets of images, creating the illusion that an invisible wearer is showcasing the clothing.
- Professional Editing Services: While it’s possible to execute ghost mannequin edits with software like Adobe Photoshop, many businesses opt to outsource this task to professional editors who specialize in this technique. These experts can efficiently handle the intricate editing process, ensuring a flawless outcome. Furthermore, they often offer quick turnaround times and discounts for bulk orders.
Advantages of Ghost Mannequin Images:
- Realism: Ghost mannequin shots provide a heightened sense of realism. Customers can more easily visualize how the garments will appear when worn, including details like the fit and shape.
- Visual Appeal: These images are inherently more engaging and visually appealing compared to standard product photos featuring clothing on hangers or flat surfaces. They allow you to effectively showcase the clothing’s design and style.
- Brand Cohesion: Ghost mannequin images contribute to a consistent and professional aesthetic for your product catalog or online store. This visual cohesion reinforces your brand identity and elevates the overall perception of your products.
In summary, ghost mannequin photography offers a dynamic and effective means of presenting clothing items that go beyond conventional methods. When executed with care, this technique provides customers with a realistic and engaging view of your products. The investment in planning and post-processing pays off by enhancing the appeal of your garments and elevating your brand’s visual presentation, ultimately leading to increased customer engagement and sales.
10. Change clothing color variants
Indeed, the prospect of reshooting an entire collection when introducing a new color variation can be a concern for businesses. However, there’s a clever solution available: post-production color adjustment. If you’ve already photographed a garment, you have the option to modify its color in post-processing to align with the new color option in stock. This approach offers multiple advantages:
1. Time and Resource Efficiency:
- Eliminates the Need for Reshooting: Post-production color adjustment eliminates the need to orchestrate a fresh photoshoot for each new color variation. This not only conserves time but also reduces the expenses associated with arranging model sessions, studio rentals, and photographic equipment.
- Flexible Shop Listings: By possessing the capability to adapt the color of existing product images, you gain the flexibility to swiftly update your shop listings whenever a new color variant becomes accessible. This adaptability is particularly valuable in the dynamic realm of fashion and e-commerce.
2. Consistency and Brand Cohesion:
- Sustains Visual Consistency: Maintaining consistency in product presentation is pivotal for cultivating a strong brand identity. Post-production color adjustment ensures that all product images, irrespective of color variations, uphold a uniform and professional appearance. This contributes to a coherent and enticing online store.
- Brand Adaptability: Brands frequently introduce new color options to align with seasonal trends or customer preferences. With post-production color adjustment, you can promptly align your existing product images with these alterations, remaining agile and responsive in the market.
3. Elevated Customer Experience:
- Accurate Depiction: Customers rely on product images to make well-informed purchasing decisions. By guaranteeing that the color represented in your product images precisely corresponds to what’s available in stock, you offer a more transparent and dependable shopping experience, minimizing misunderstandings or returns.
- Rapid Updates: With the ability to rapidly update product color options, you can respond more effectively to customer demands. When a new color is introduced, you can promptly incorporate it into your online store, satisfying customer expectations and potentially boosting sales.
Integrating post-production color adjustment into your product photography workflow is a strategic move that streamlines your operations, reinforces your brand’s visual uniformity, and enriches the shopping experience for your customers. This technique not only saves valuable time and resources but also positions your brand to adapt nimbly to market shifts and shifts in product offerings.
11. Align images for an appealing online store
Creating a visually appealing and cohesive e-commerce store can be challenging, especially when working with diverse models. However, there’s a simple yet effective method to achieve this goal: aligning or cropping all of your main listing photos. This approach ensures that when customers visit your shop, they encounter items of similar types presented in a consistent manner. Let’s explore how this technique can be put into practice, drawing inspiration from Cotopaxi, an outdoor gear brand dedicated to sustainability.
Key Strategies for a Unified E-commerce Store Look:
-
Centralizing the Main Product Listing Photo:
- Consistency in Model Placement: Cotopaxi’s online storefront showcases a smart strategy by centralizing the models in the main product listing photos. This uniform positioning maintains a cohesive appearance across product listings.
- Flexibility in Model Posing: Not all models share the same body type or proportions, and this is where central positioning shines. By allowing flexibility in model posing while keeping the overall layout uniform, you can accommodate diverse talent and still maintain a consistent aesthetic.
- Even Spacing at the Top: To achieve this uniformity, ensure there’s an even spacing between the top of the image and the model’s head. This meticulous attention to detail creates a polished and harmonious look across your product listings.
-
Consistent Display for Bottoms:
- Maintaining a Standard Distance: Cotopaxi extends this method to displaying bottoms. Instead of showcasing full-body shots, they maintain a consistent distance between the model’s feet and the bottom of the image. This approach leaves just enough space to reveal a small portion of the model’s top.
Advantages of Alignment and Cropping:
- Visual Cohesion: Implementing this strategy fosters a cohesive and visually appealing online store. Customers are presented with a uniform layout and presentation style, making it easier to navigate and compare products.
- Professionalism: Consistency in how products are presented exudes professionalism. It demonstrates attention to detail and a commitment to providing customers with a seamless and polished shopping experience.
- Flexibility with Diverse Talent: By allowing flexibility in model posing while adhering to consistent alignment and cropping, you can effectively showcase your products with models of varying body types and proportions.
In conclusion, aligning or cropping main listing photos is a straightforward yet effective technique to create an attractive and unified e-commerce store. Cotopaxi’s approach exemplifies how this method can be put into practice, ensuring that your products are presented consistently and professionally. This strategy not only enhances the visual appeal of your online store but also accommodates diverse talent and promotes a seamless shopping experience for your customers.
Suggested article >>

