Removing or replacing the background is the most common photo editing required for advertising and other purposes. Background removal is very often the first thing needed for advertising. The various media of advertising like magazines, newspapers, fashion magazines, posters, catalogs, flyers, etc. need to apply this technique before doing other types of photo manipulations. A rapid increase in sell-through e-commerce websites is taking place nowadays. As a result, the requirement for product photo background removal or replacement is increasing very fast day by day.
Most of the time not only replacing the background is not enough but also photographic corrections like brightness, contrast, levels, etc. are required to be adjusted. If you are not interested to do the image manipulation yourself, be sure to make confirm whether the image manipulation company is going to do this, as well. If you choose a professional graphic design firm you may get some corrections for free because a reputed firm will try to make sure the best outputs for the price and their reputation.
Now I am going to discuss how we can remove the background, and then add new background.
Although it is a complex task, I am going to make it easy by explaining the process step by step.
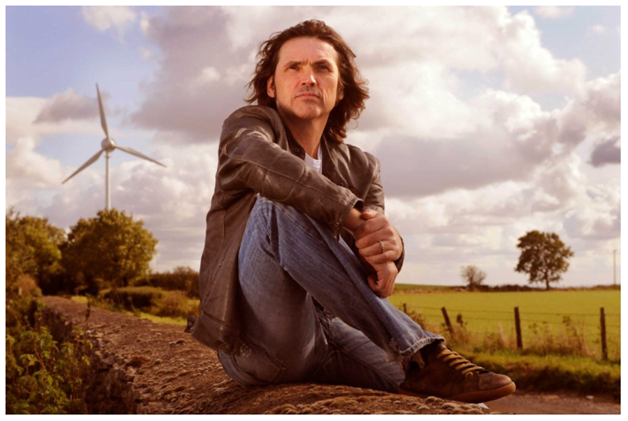
We are going to use the following image for this tutorial. You can save the image to your computer as well and go along with me. Click the right mouse button on the image and select “Save image as” from the menu.
We will change the background of this image now.
-
Open the image
You can press Ctrl + O which is a shortcut for a Photoshop document. You can click on File -> Open alternatively.
-
Zooming the Image
Now, we will zoom the image up to 300%. Press Ctrl + Spacebar + click on the bottom left corner of the image to zoom in. Press Ctrl + Alt + Spacebar + click to zoom out. There are many alternatives to zooming operations. Such as pressing Alt + Upward mouse scroll to zoom in, and Alt + Downward mouse scroll to zoom out. If you are comfortable with other methods, such as pressing Ctrl and ‘+’ simultaneously to zoom in, and Ctrl and ‘-’ to zoom out, you can use any of these methods.
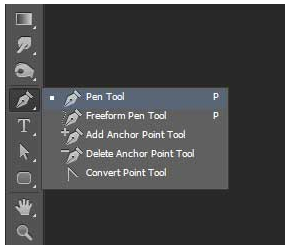
We will select the man’s figure with the pen tool now. Select the pen tool from the toolbox.
-
How to use the pen tool efficiently
Although people are often afraid of using the pen tool, with some stoicism and practice get started with the pen tool. You will become more faster and a pro of the pen tool by practicing with patience day by day.
When we deal with the pen tool we put some “anchor points”, and give the needed curves between the two anchor points using the “handles”. Sometimes we do not need curves, we need cones. We are going to see all these now. We will learn the shortcut as well as the efficient process of working with the anchor points and handles. There are many other ways of working with the combinations of “pen tool” and “selection tool”. You can practice of making various shapes and/or tracing/cutting easy and simple objects from images to get your hands fluent in the pen tool.
At first, we have to select the pen tool from the toolbox.
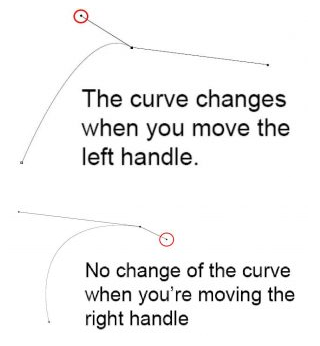
Let’s have a look on the following image now.
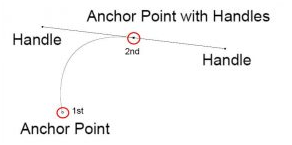
An anchor point is just a point or dots on the screen. We need the anchor points to have handles to make curves. To put just an anchor point, click on the place of the image you want to put it and you will get an anchor point. Now if you click on another place above and without releasing the mouse drag rightward (or leftward for a reverse directional curved line) you will get two handles associated with the 2nd anchor point. And you see, we’ve got a curved line in between the anchor points. We can also change the curve by moving the handles, and making the handles bigger or smaller. You can click on the handle while pressing the Ctrl key and move the handle in any direction to move a handle or to make it bigger or smaller. If you move the left handle of the above image the curve will change according to your movement of the handle.
Suppose now you want to make a straight line downward. For this, click on the 2nd anchor point (with handles) while pressing the Alt key. This will remove the right-side handle.

To make a straight line to the shape, we will click on the bottom area now. If we hold down the shift key while clicking, the line will be perfectly vertical. So, we will hold down the shift key to get a perfect-looking vertical line.
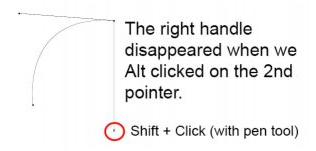
We will click back to the 1st anchor point to finish the shape of the path. When we will place the pen pointer on the 1st anchor point a very small circle will appear just under the pen tool pointer.
4. Select the man’s figure using the pen tool
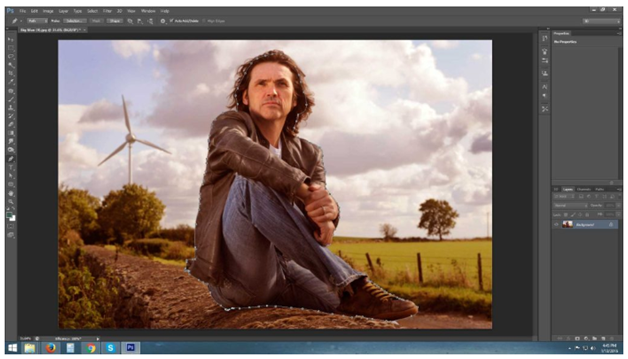
Select the man’s figure using the pen tool
We will follow the above-mentioned methods and tips for using the pen tool to make the path around the figure of the man in the image.
-
Refine the edges of the hair region
We have selected the hair region roughly because we will comprise the hairs in more detail now. At first, we will go for the refine edge method for this. To make a selection of our path, press Ctrl + Enter now. To refine the edges, you should select the outer areas of the hair which we’ve already selected. For doing this go to the menu – Select -> Refine Edge menu option. When the refine edge pops up, the menu comes up.
With the refine edge brush select the unselected hair outside of the selection.
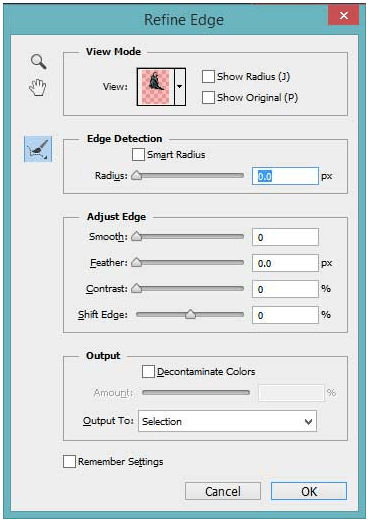
Refine the edge dialog box.
Now with the refine edge brush, we rub over the unselected hairs on the edge. This will select those hairs.
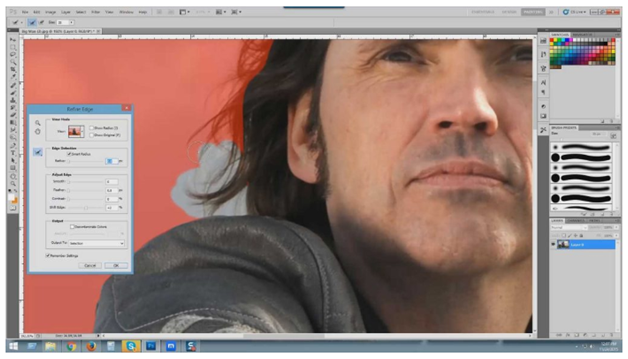
Rubbing on the hair edge pic –1
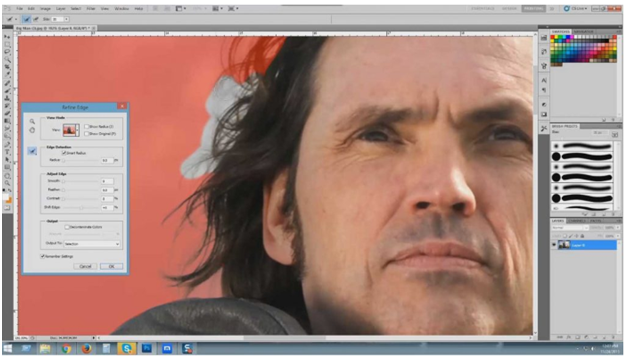
Rubbing on the hair edge pic – 2
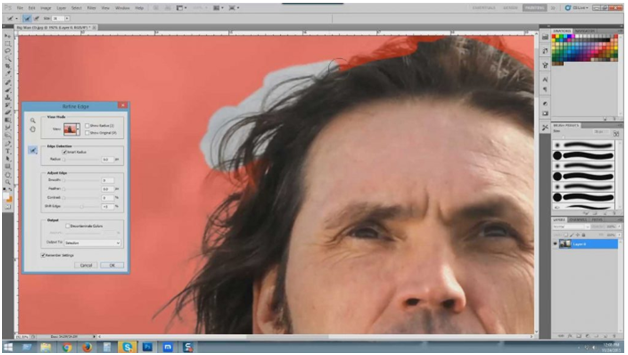
Rubbing on the hair edge pic – 3
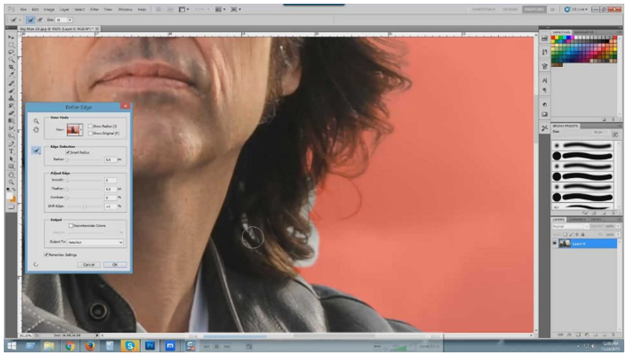
Rubbing on the hair edge pic – 4 (finishing this process)
After we are satisfied with selecting the necessary hairs, we got to press OK button of the Refine Edge dialog box. This will select the figure of the person we want to get in a new background.
- Placing the object (the man) in new background
Press Ctrl + C to copy the selection.
Open the image we want to be in a new background.
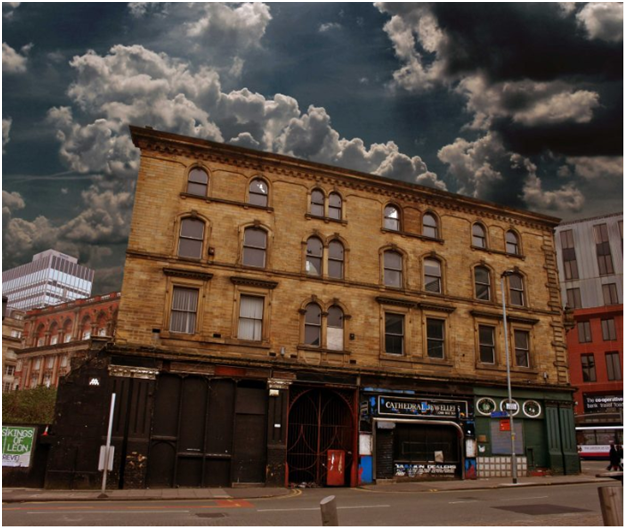
The new background we are going to use now.
Now press Ctrl + V to paste the man’s figure without the old background. This will paste the figure on a new layer.
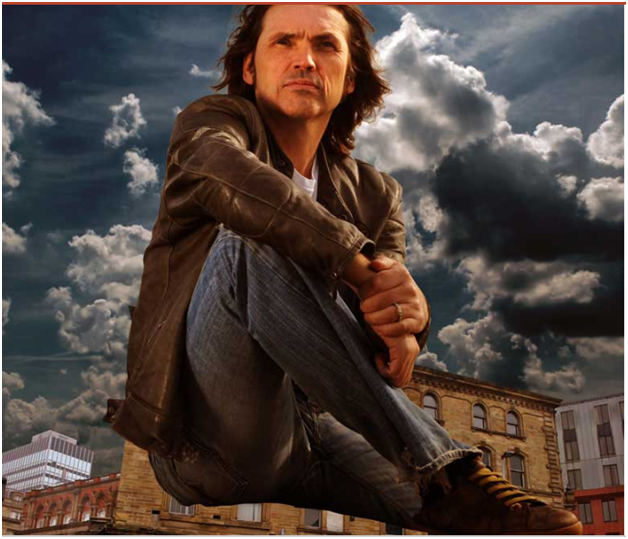
A new layer was created with the man’s figure.
Now, we need to place the figure in the right place. Press the “V” key or select the move tool from the toolbox. Move the layer with the mouse to place the figure in the right place. We can use the arrow keys to place the man perfectly in place.
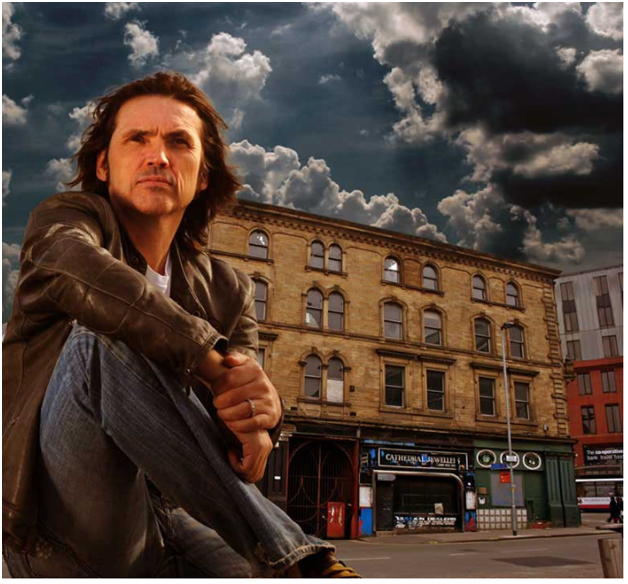
The man is in a new background.
And finally, the background is removed. We’ve done a pretty good job. Keep smiling.
Suggested article>>
Background Removal With Photoshop Online


