
Creating a perfect clipping path is a fundamental skill in graphic design and image editing. It involves accurately selecting and isolating an object or subject within an image, allowing you to remove the background or make targeted adjustments while maintaining clean, precise edges.
In this comprehensive guide, we will explain the step-by-step process for creating a perfect clipping path.
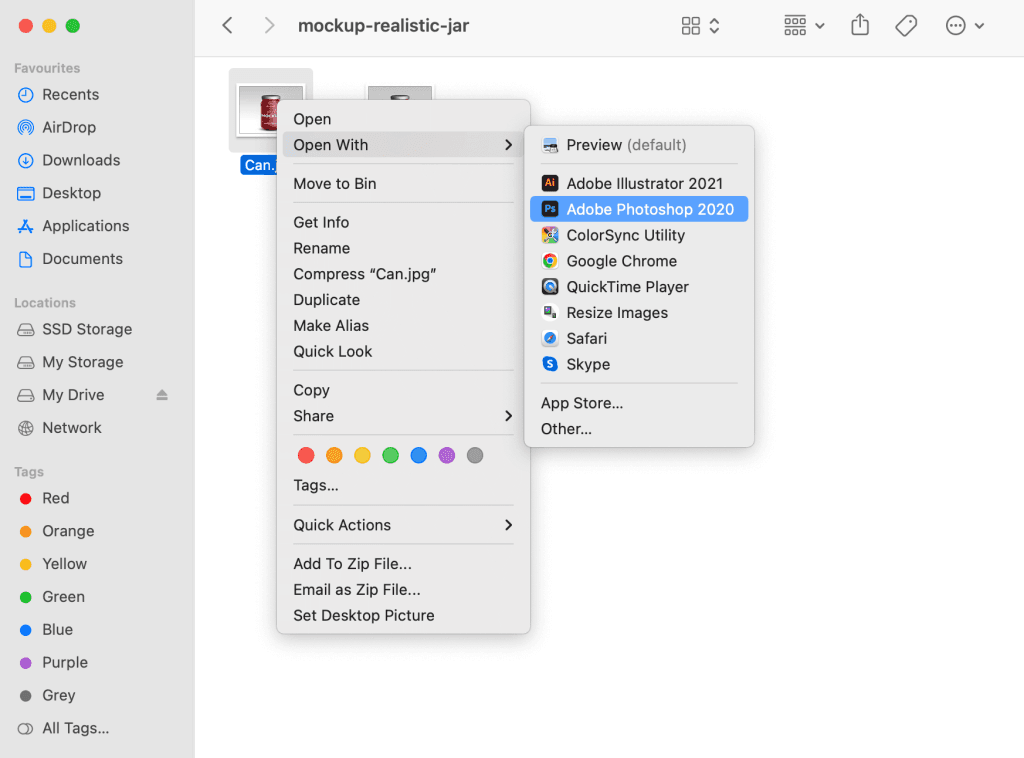
Step 1: Choose the Right Software:

To create a perfect clipping path, you’ll need software with robust selection and path creation tools. Adobe Photoshop is the industry standard, but there are other options like GIMP and Adobe Illustrator that can also be used for this purpose.
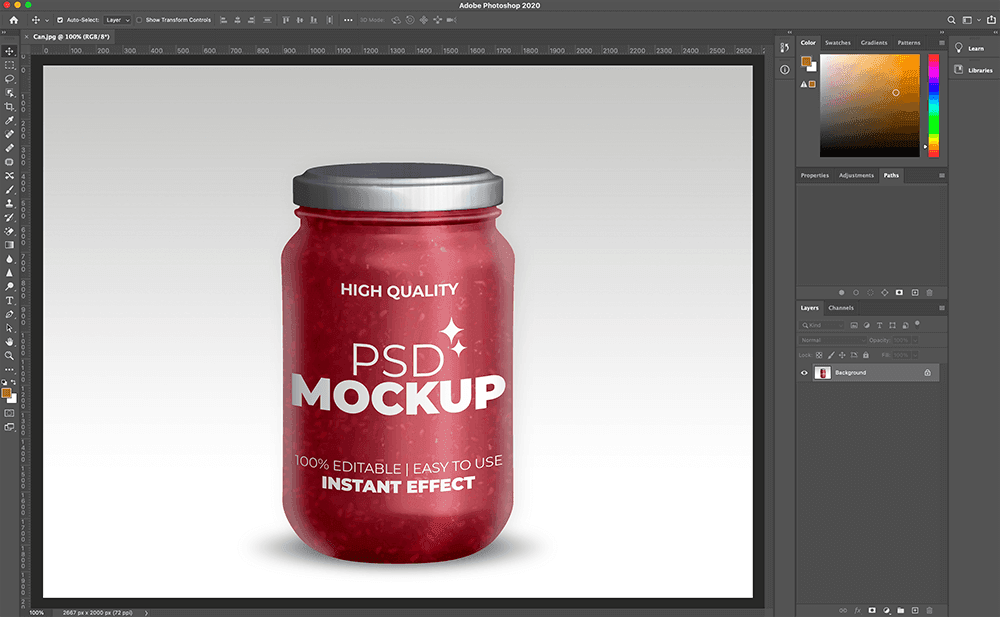
Step 2: Open Your Image:
Start by opening the image you want to work on in your chosen software. Ensure that you are working with a high-resolution image for better accuracy.
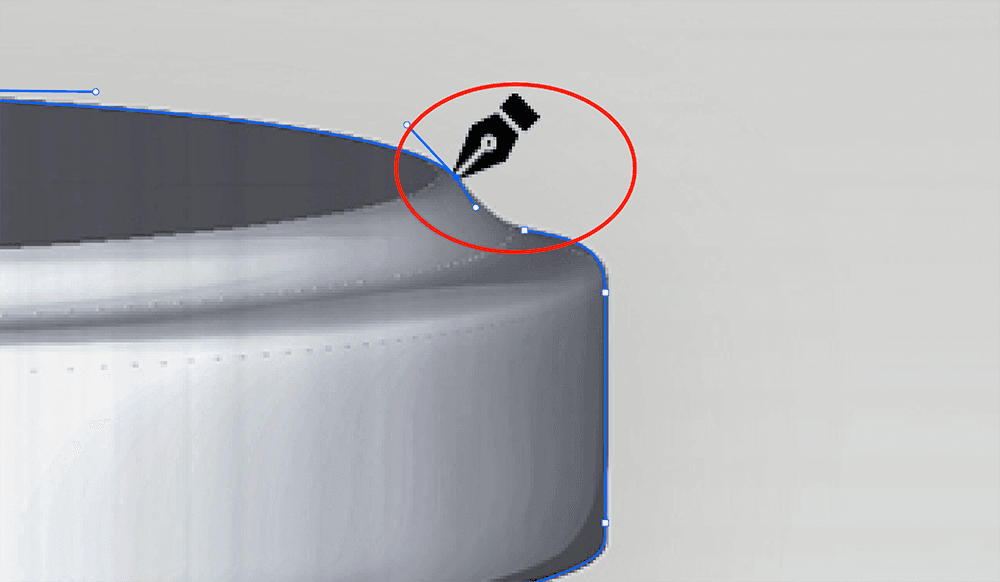
Step 3: Select the Pen Tool:
In Photoshop or Illustrator, select the Pen Tool from the toolbar. This tool allows you to create precise paths by adding anchor points and adjusting curves.
Step 4: Begin Path Creation:
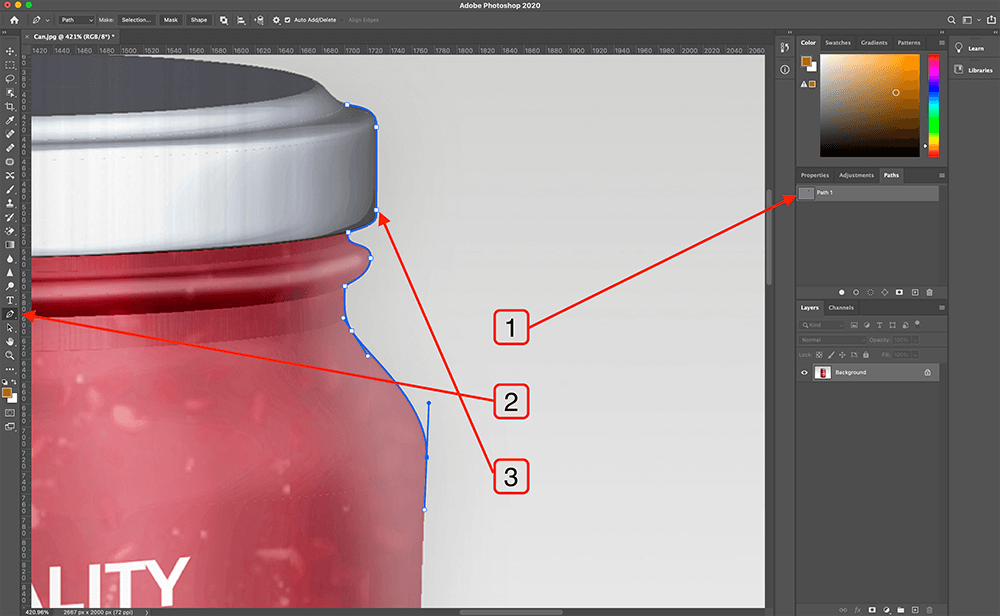
Zoom in on the area you want to clip. Click on the edge of the object you want to clip to create your first anchor point. Continue clicking along the object’s outline, adding anchor points as needed to follow its contours closely.
Step 5: Adjust Anchor Points and Handles:
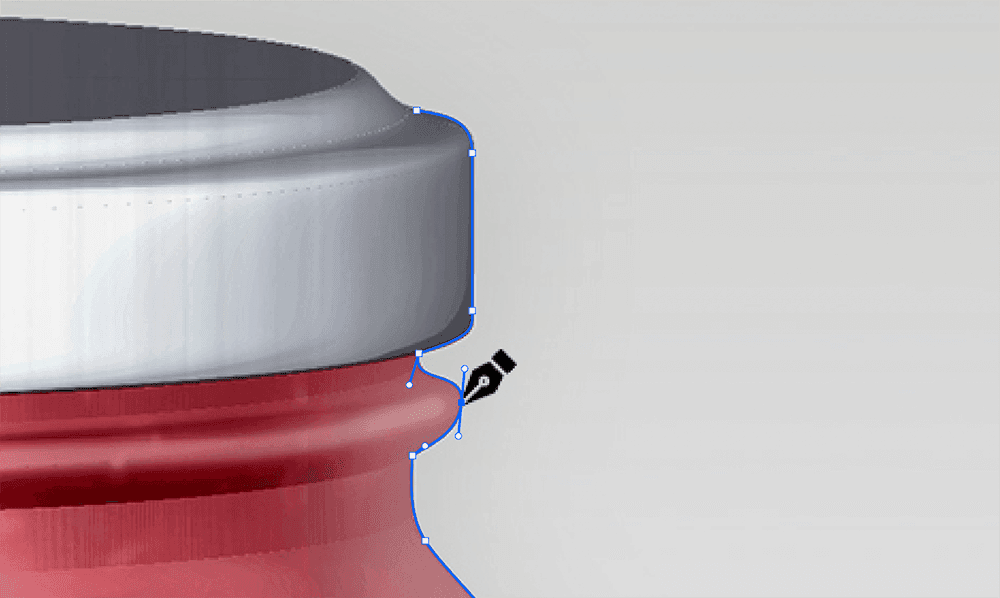
To create smooth curves, use the handles of the anchor points. Click and drag the handles to adjust the curve of the path between two anchor points. This is particularly important for objects with curved or irregular shapes.
Step 6: Close the Path:
Once you’ve outlined the entire object, you’ll need to close the path by connecting it to the starting point. Hover over the initial anchor point, and a small circle icon will appear. Click on it to close the path.
Step 7: Fine-Tune the Path:
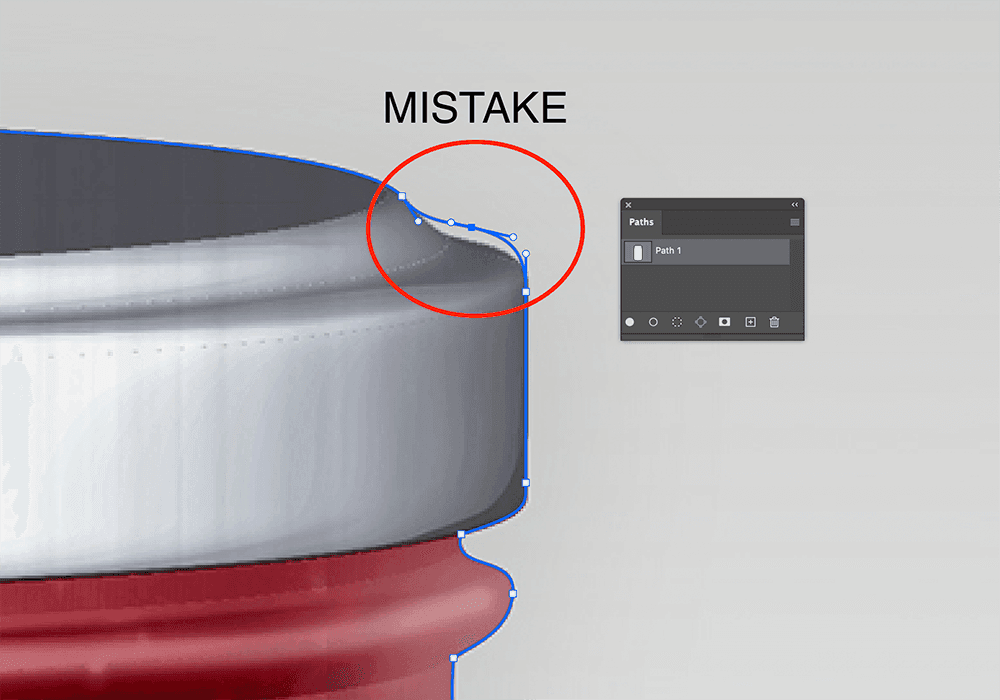
To create a perfect clipping path, it’s often necessary to fine-tune the path. Use the Direct Selection Tool (white arrow) to select individual anchor points and make adjustments. You can move, add, or delete anchor points as needed to achieve precision.
Step 8: Evaluate the Path:
Zoom out and evaluate the path you’ve created. Make sure it accurately follows the object’s contours and edges. Pay close attention to areas with intricate details, such as hair or complex shapes, as they may require additional refinement.
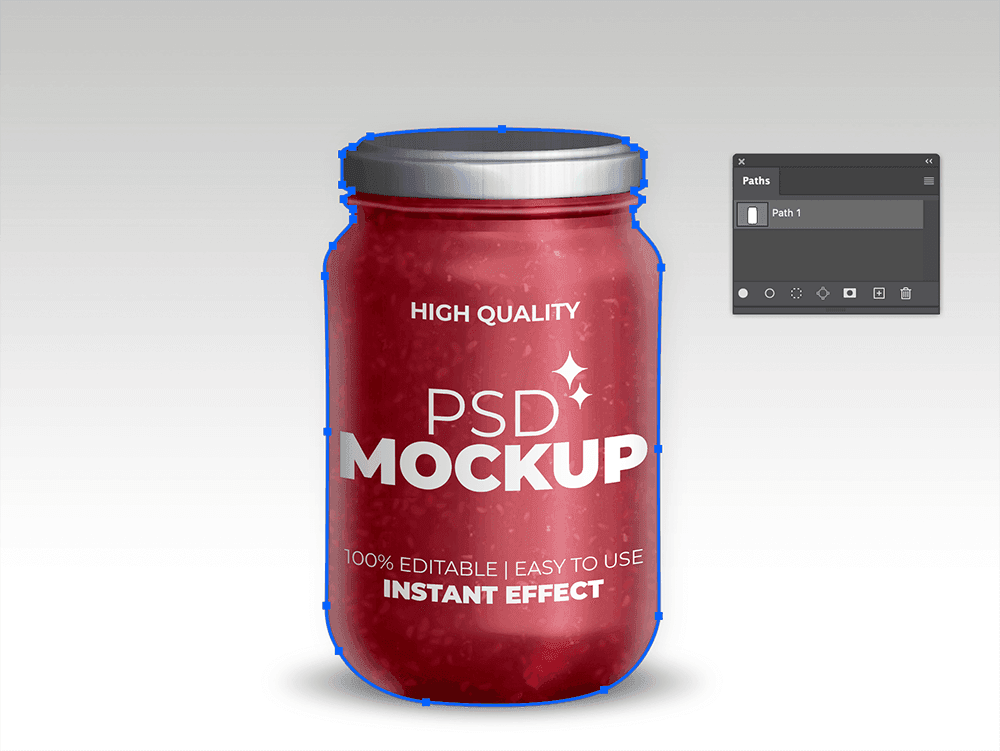
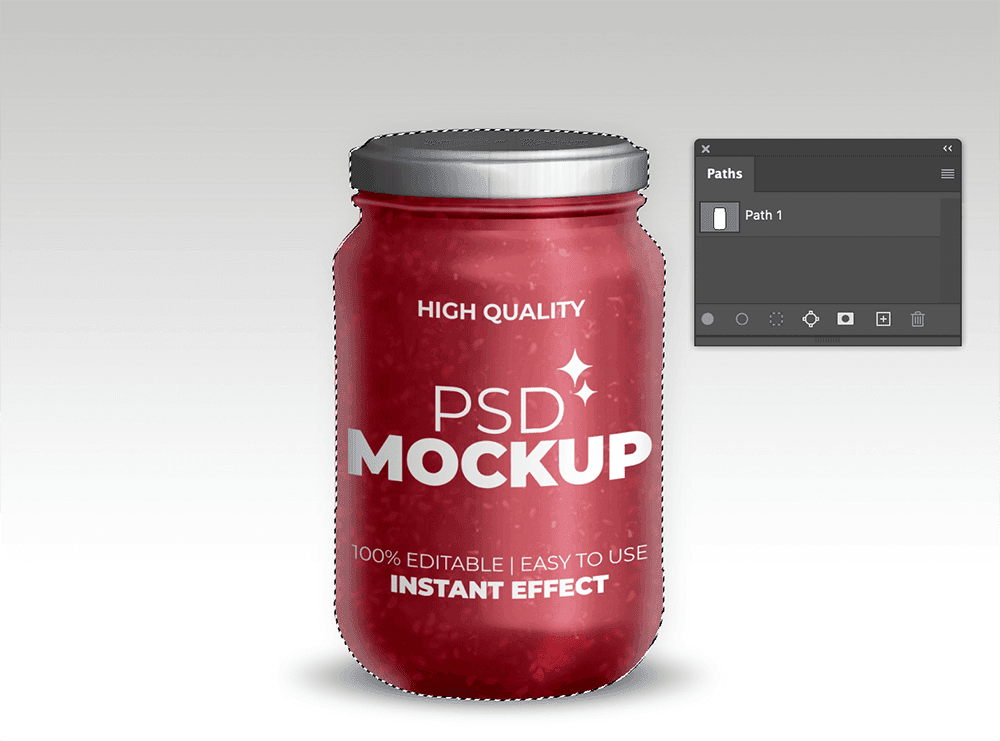
Step 9: Convert the Path to a Selection:
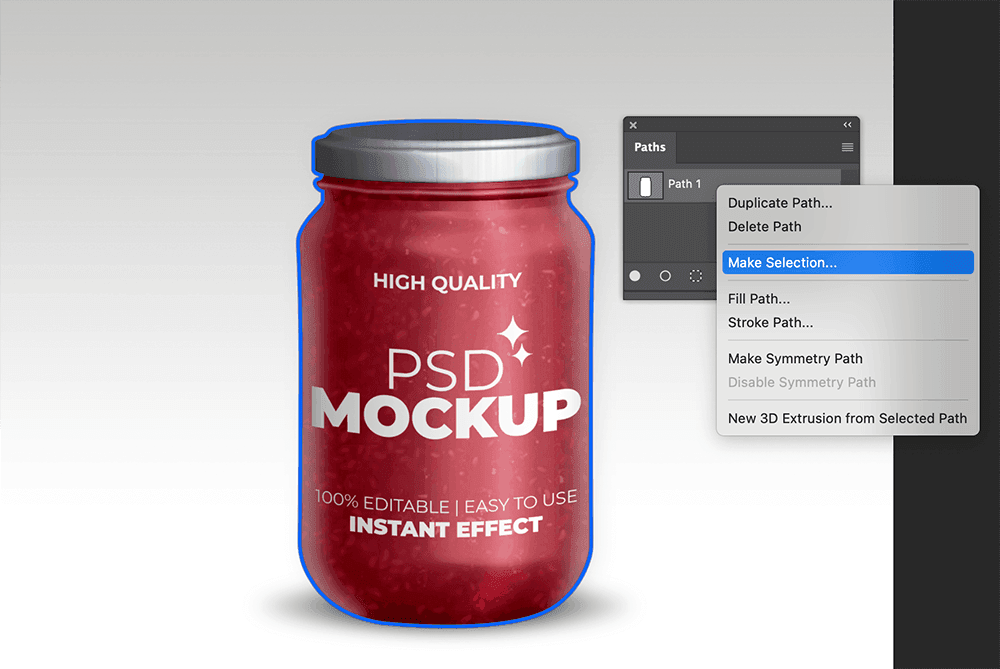
After you’ve created a precise path, it’s time to convert it into a selection. In Photoshop, right-click on the path in the Paths panel and choose “Make Selection.” In Illustrator, go to the Object menu and select “Clipping Path” > “Make.”
Step 10: Refine the Selection (Optional):
Depending on your project’s requirements, you may need to refine the selection further. Use tools like the Refine Edge or Feather options to adjust the selection’s edges, particularly if you want to create a smoother transition between the object and the background.
Step 11: Isolate or Edit the Object:
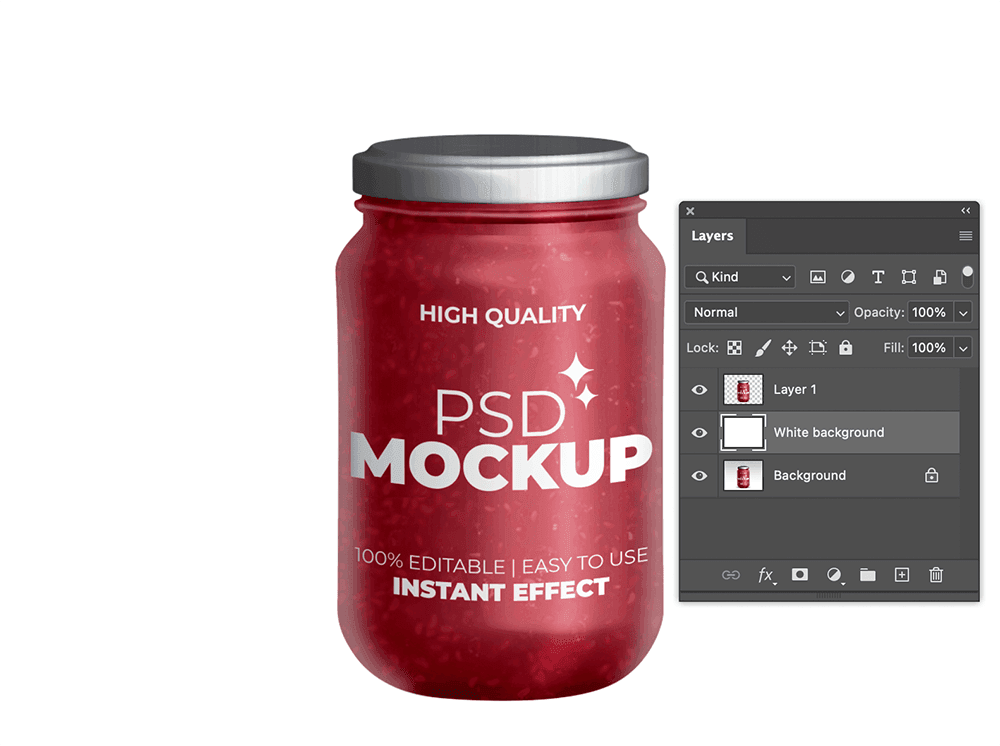
Now that you have a perfect clipping path selection, you can isolate the object from the background or make targeted adjustments. For background removal, simply delete the background layer or apply a mask to hide it. If you want to edit the object, you can apply adjustments, filters, or retouching techniques while keeping the object isolated.
Step 12: Save the Image:
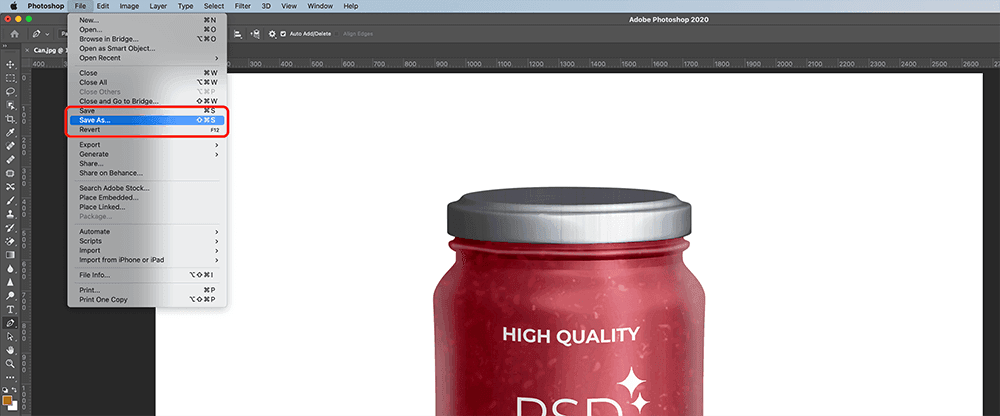
Once you are satisfied with the result, save the image in an appropriate format. If you want to maintain transparency, save it as a PNG or TIFF. For images with a solid-colored background, you can save them as JPEG or any other suitable format.
Step 13: Save the Clipping Path (Optional):
If you plan to use the image in a layout software like Adobe InDesign, you can save the clipping path information.
In Photoshop, go to the Paths panel, right-click the path, and choose “Save Path.” This allows you to import the image with the clipping path into InDesign for further layout and design work.
Step 14: Keep a Backup:
Always keep a backup of your original image in case you need to make revisions or changes later. Saving your work as a PSD or AI file preserves the layers and paths for future editing.
Step 15: Practice and Refine Your Skills:
Creating a perfect clipping path requires practice and patience. The more you work with the Pen Tool and refine your skills, the better your results will be. Experiment with different types of images and objects to become proficient in this essential graphic design technique.
Additional Tips for Creating a Perfect Clipping Path:
- Use Keyboard Shortcuts: Keyboard shortcuts in software like Photoshop can help speed up your workflow. Learn shortcuts for zooming in/out, switching tools, and navigating the canvas.
- Take Breaks: Working on intricate clipping paths for extended periods can be tiring. Take breaks to rest your eyes and maintain concentration.
- Use Guides and Grids: Guides and grids can help you align anchor points and maintain consistency in your paths.
- Practice with Different Objects: Objects with various shapes, textures, and complexities will provide valuable experience in creating clipping paths for a range of scenarios.
- Consider Pen Tablet: A graphics tablet, like a Wacom tablet, can provide more precise control than a mouse for creating paths, especially in detailed areas.
- Master Selection Tools: In addition to the Pen Tool, become proficient with other selection tools like the Magic Wand or Quick Selection Tool, as they can be useful for initial selections before refining with the Pen Tool.
In conclusion, creating a perfect clipping path is an essential skill for graphic designers and image editors. It allows you to isolate objects, remove backgrounds, and make precise edits in a wide range of design projects. By following the step-by-step process outlined in this guide and incorporating additional tips, you can achieve professional and flawless results in your image editing endeavors. Remember that practice and patience are key to mastering this valuable skill.
You can also remove the background using image masking techniques.
Suggested article >>


