eCommerce Product Photo Editing for Increased Sales
Capturing and uploading product photos is a fundamental step in showcasing your merchandise online. However, to truly excel and boost your sales, you need to take your product photography to the next level. In this article, we’ll provide you with creative ideas on how to enhance and edit your product shots to maximize their sales potential.
1. Eliminating Distractions and Perfecting Your Product Photography
In the realm of e-commerce, the ability for shoppers to swiftly and effortlessly comprehend your offerings is paramount. However, an excess of distractions can divert attention away from the focal point—the product itself.
These distractions manifest in various forms: an abundance of props, background disturbances in lifestyle shoots, the intrusion of glare due to lighting, or even the occasional blemish like a speck of dust or an unexpected stain.
The solution lies in the realm of photo retouching, typically executed through software like Adobe Photoshop or analogous editing tools. You can gain insights on how to adeptly eliminate unwanted elements from your visuals through tutorials, or alternatively, entrust this task to a virtual photo editing studio capable of handling it on your behalf.
2. Optimizing Product Presentation: Filling the Frame for Enhanced Shopper Experience
In the world of e-commerce, adhering to specific requirements and best practices is crucial to engage potential buyers effectively. One such requirement, mandated by platforms like Amazon, as well as a widely acclaimed best practice across the e-commerce landscape, is ensuring that your product occupies a significant portion of the frame in your images.
By filling the frame with your product, you grant shoppers an unobstructed and detailed view, eliminating the need for zooming, straining their eyes, or navigating additional clicks—regardless of the device they’re using.
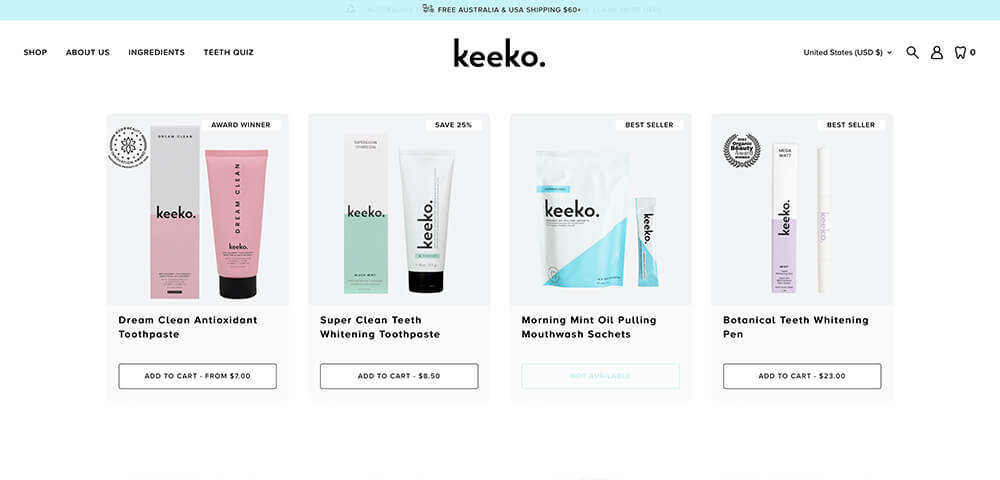
For instance, let’s take the oral care brand Keeko as an example. They employ a strategy of using white background main images that zoom in on the product, effectively maximizing its presence within the frame. While the toothpaste product, situated on the far left, may be physically larger than the floss on the far right, it’s important to note that, at this initial stage of the shopping journey, shoppers do not necessarily require a scale reference. Such details can be conveniently provided through secondary images on the actual product page, streamlining the shopping experience further.
3. Optimizing Product Imagery: Striking the Perfect Balance
In the realm of e-commerce, the quantity of product photos you provide plays a pivotal role in conveying essential information to potential buyers. However, it’s crucial to strike a delicate balance, as an excess of images can overwhelm shoppers, while too few can leave them lacking crucial details. The key lies in finding that optimal equilibrium.
Based on a comprehensive analysis of 25 leading brands, it has been determined that the ideal range for product images typically falls between three to five. For most brands and products, a minimum of three images is recommended:
- Front of the Product: A clear, frontal view to provide a comprehensive understanding of the item.
- Back of the Product: An image showcasing the reverse side, ensuring buyers have a complete view of the product.
- Detail Shot: An up-close image highlighting intricate details or unique features of the product.
It’s important to note that while best practices offer valuable guidelines, the ultimate choice should align with the specific needs of your product and your target audience. To gain further insight, you can conduct a quick search on prominent e-commerce platforms like Amazon. For instance, if you’re in the makeup industry, simply search “best makeup brands” on Amazon, select a top-selling item, and examine the number and types of product photos featured by that brand for inspiration and alignment with industry standards.
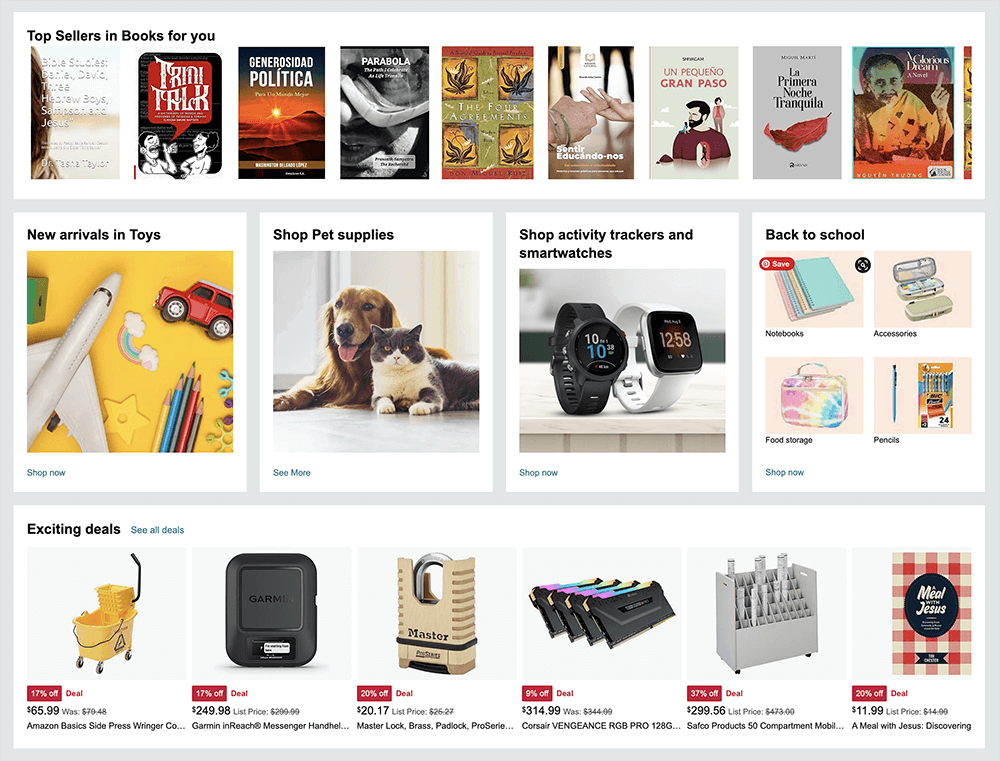
In the quest for a well-rounded understanding of effective product presentation, it’s advisable to broaden your research horizon beyond Amazon listings, especially if you intend to sell directly to consumers through your own online store. Many brands maintain their websites, providing valuable insights into their product photography strategies. For instance, consider the case of Native, a deodorant and wellness brand, which offers an illustrative example.
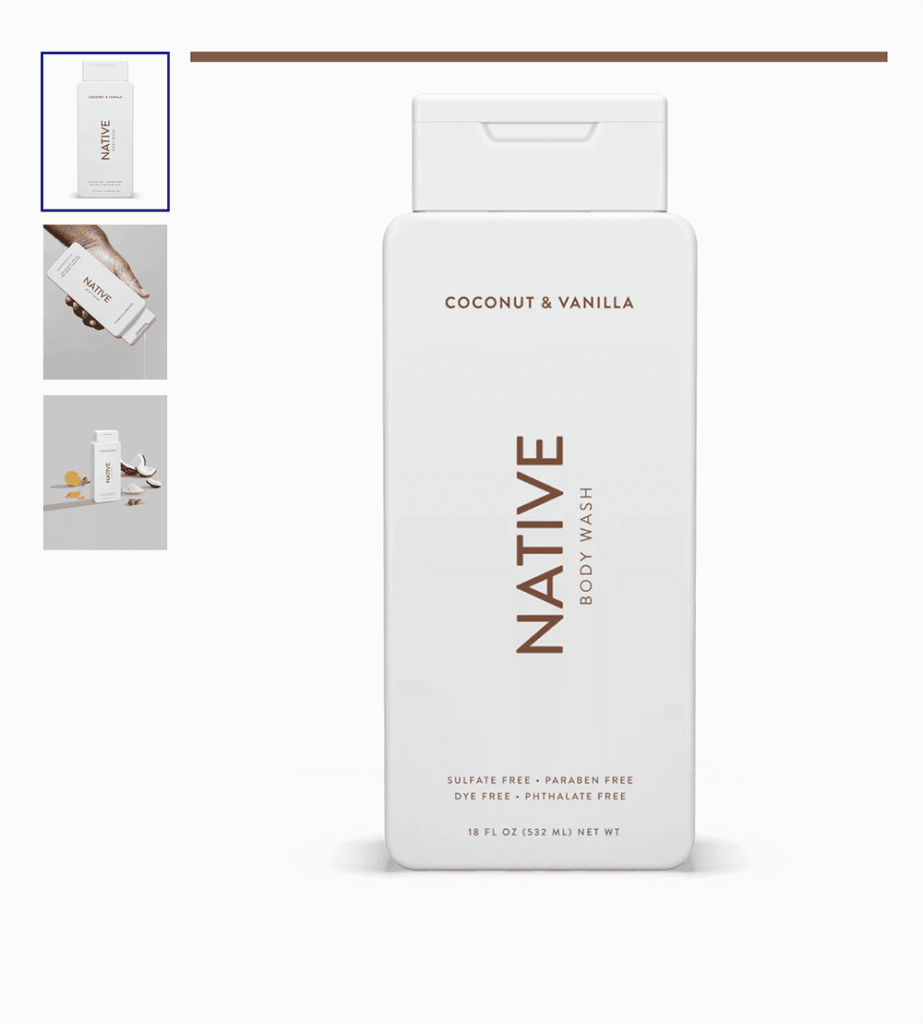
Native’s approach to product imagery involves featuring a total of five photos for its facial cleanser. This comprehensive approach includes several images that solely highlight the product in isolation, allowing customers to scrutinize it closely. Furthermore, they incorporate a few shots that incorporate models, providing a relatable context for potential buyers and showcasing the product in use.
By exploring a brand’s website, you can gain a deeper understanding of how industry leaders like Native approach product photography, offering you valuable insights to tailor your own strategies for your unique product and customer base.
4. Using the white background perfectly
In the realm of online product photography, adhering to the standard of using white backgrounds for your main product photos is highly recommended. Even in scenarios where achieving a white background on set may pose challenges, it’s essential to prioritize this practice. White backgrounds offer numerous advantages, simplifying the shopping experience for potential buyers by making it effortless to view products, make comparisons, and navigate to items of interest.
In most cases, it is advisable to default to white backgrounds for your online hero and main images, as these serve as the primary visual representations of your products. For instance, Hero Cosmetics, a notable brand in the beauty industry, employs a straightforward approach with product-focused photos set against a white backdrop. This strategy effectively accentuates their products, allowing shoppers to easily discern their options and make informed decisions.
The use of white backgrounds is a proven method to enhance the clarity and accessibility of your product offerings, promoting a seamless and enjoyable shopping experience for your audience.
While adopting white backgrounds is a sound strategy for product photography on your own website, you need not limit yourself to a stark, pure white. There’s room for creativity and personalization by selecting a hue or shade of white that aligns with your brand’s aesthetic. A prime illustration of this concept can be observed in the approach taken by Hylo Athletics, a brand specializing in vegan shoes.
Sephora, in a departure from the conventional stark white backdrop, opts for an off-white background to showcase its vegan shoe collection. This nuanced choice adds a touch of uniqueness to their product imagery while still maintaining the clean and elegant appeal associated with white backgrounds.
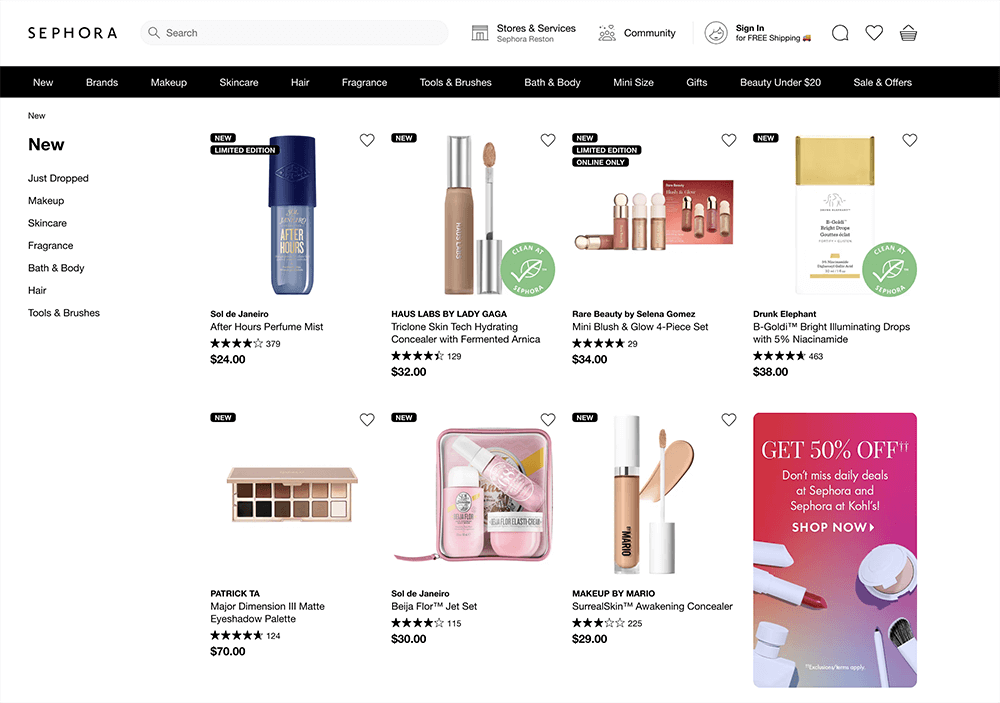
By embracing a subtle shift in the hue of your white background, you can infuse your brand’s personality into your product photos, establishing a distinct visual identity that resonates with your target audience. This allows you to strike a balance between adherence to best practices and the expression of your brand’s individuality.
Images
In cases where achieving a white background during the photoshoot proves challenging, there’s a viable solution: post-production editing. After the photoshoot, you can seamlessly remove the existing background and subsequently modify it to meet your needs. This versatile approach allows you to achieve a white background or create a transparent one, enhancing the adaptability of your product images for universal digital applications.
By employing post-production techniques, you retain the flexibility to refine your product imagery, ensuring it aligns with the desired aesthetic and presentation standards. Whether you opt for a crisp white background or the versatility of transparency, this method empowers you to overcome initial limitations and produce compelling visuals that resonate with your target audience.
5. Changing the product background color
While white backgrounds undoubtedly serve as the foundation for your primary product photos, there’s ample room for creativity, particularly when it comes to your brand’s website and social media platforms. Embracing this creative latitude can yield engaging results that captivate your audience. One way to infuse creativity is by manipulating background colors, a process easily accomplished with tools like Photoshop or similar software.
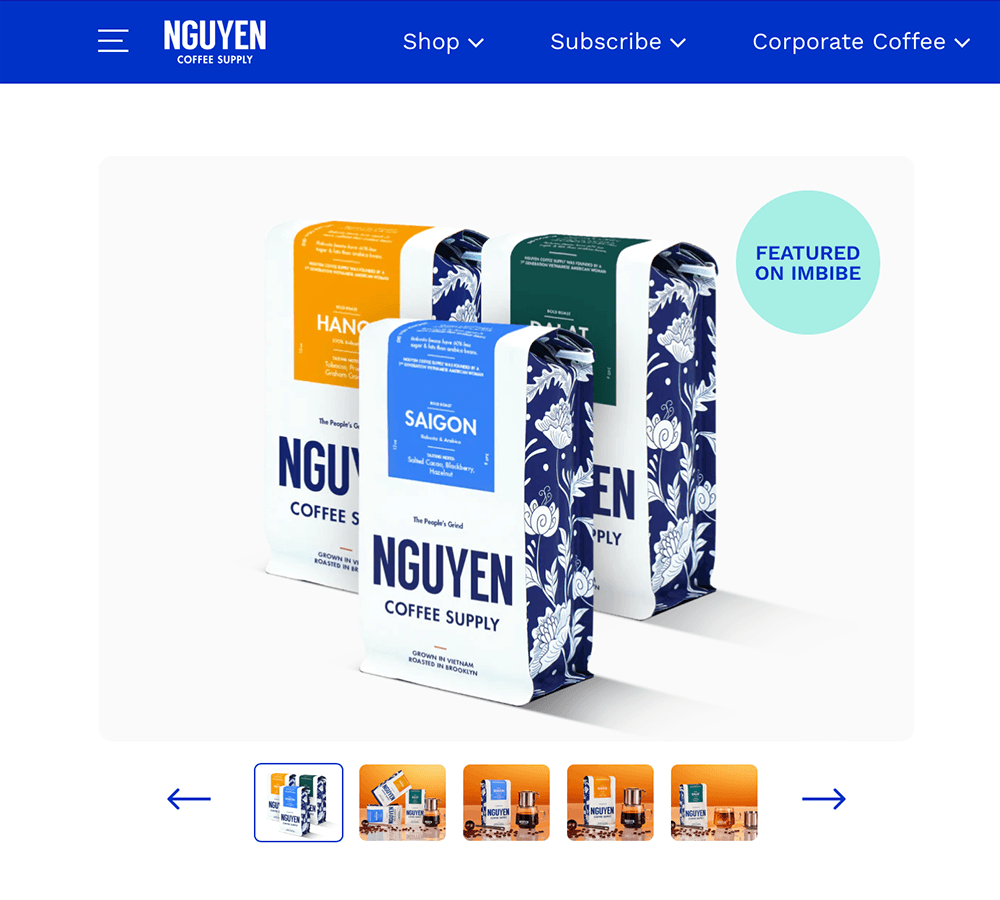
Don’t hesitate to embark on a journey of experimentation with various background colors, assessing their resonance with your target demographic. To assist in this endeavor, consider the following tips on selecting the most fitting color:
Suggested article >>
6. Blending White Background and Lifestyle Photography
Lifestyle photography is a comprehensive endeavor, often involving intricate set design, props, meticulous styling, and the potential inclusion of models and assistants. While it demands more resources, it’s a pivotal strategy to resonate with a diverse customer base. Striking a balance between white background and lifestyle photography is the key, as it allows you to provide contextual depth to potential buyers by showcasing your products in real-world scenarios.
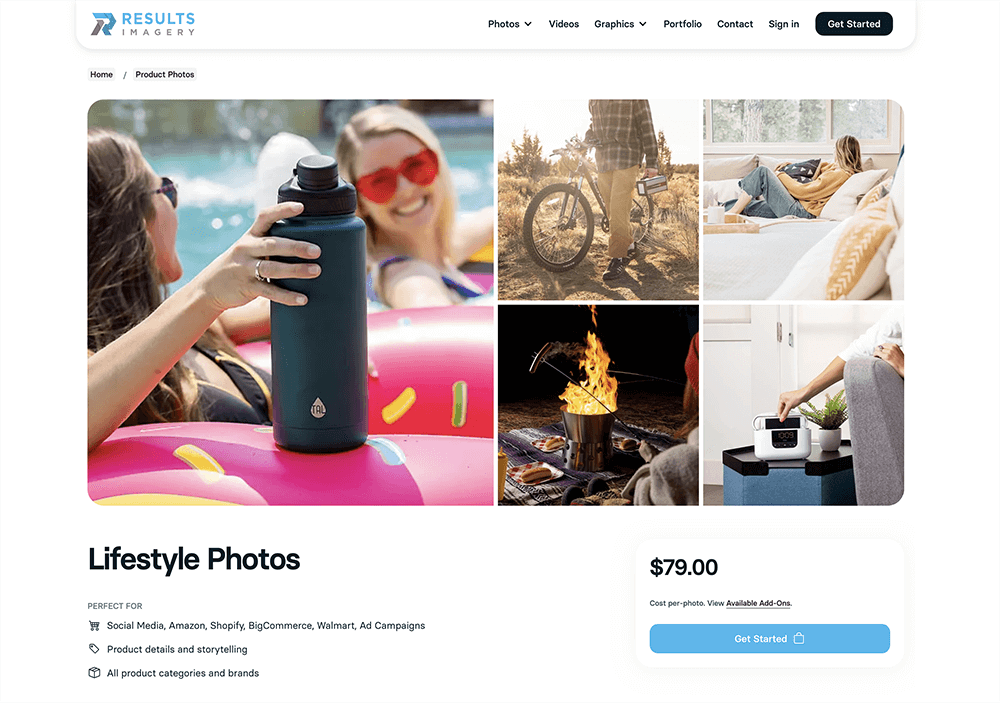
If budget constraints limit your capacity to execute an elaborate lifestyle shoot, there are alternative solutions:
- Outsourcing Expertise: Consider outsourcing the creation of lifestyle imagery. You can provide your white background images and select stock photos to a professional studio capable of composing compelling scenes that align with your brand’s vision.
- Professional Studio Collaboration: Collaborate with a dedicated photography studio like Products On White Photography. They can handle the entire process, from shooting to editing composites, ensuring your lifestyle photography meets the highest standards.
By exploring these options, you can effectively bridge the gap between the two photography styles, offering potential customers a comprehensive and visually appealing experience without straining your budget or resources.
7. Perfecting Lighting from Shoot to Edit
Achieving optimal lighting conditions ideally begins during the photoshoot itself. While it’s the preferred approach, it’s not always feasible to get lighting perfect during the initial shoot. Various factors, such as unfavorable weather, glare, or unwanted reflections, can hinder the process. In such cases, post-processing steps can come to the rescue.
A prime example, shared by Mandi Johnson, a prominent fashion photographer and blogger, demonstrates the transformative power of minor lighting adjustments in post-processing. This simple yet effective technique showcases how a slight alteration in lighting can significantly influence the overall look and ambiance of the same photograph.

The key takeaway here is that depending on your brand’s identity and positioning, subtle lighting tweaks can be leveraged to precisely craft the desired emotional resonance with your audience. By mastering both on-site and post-processing lighting techniques, you can consistently deliver compelling visuals that align with your brand’s unique character.
8. Perfecting Shadows in Product Photography
In the realm of product photography, shadows play a pivotal role in infusing depth and vitality into otherwise flat, white background images. They present a challenge but offer the potential for a remarkable transformation in the final result.
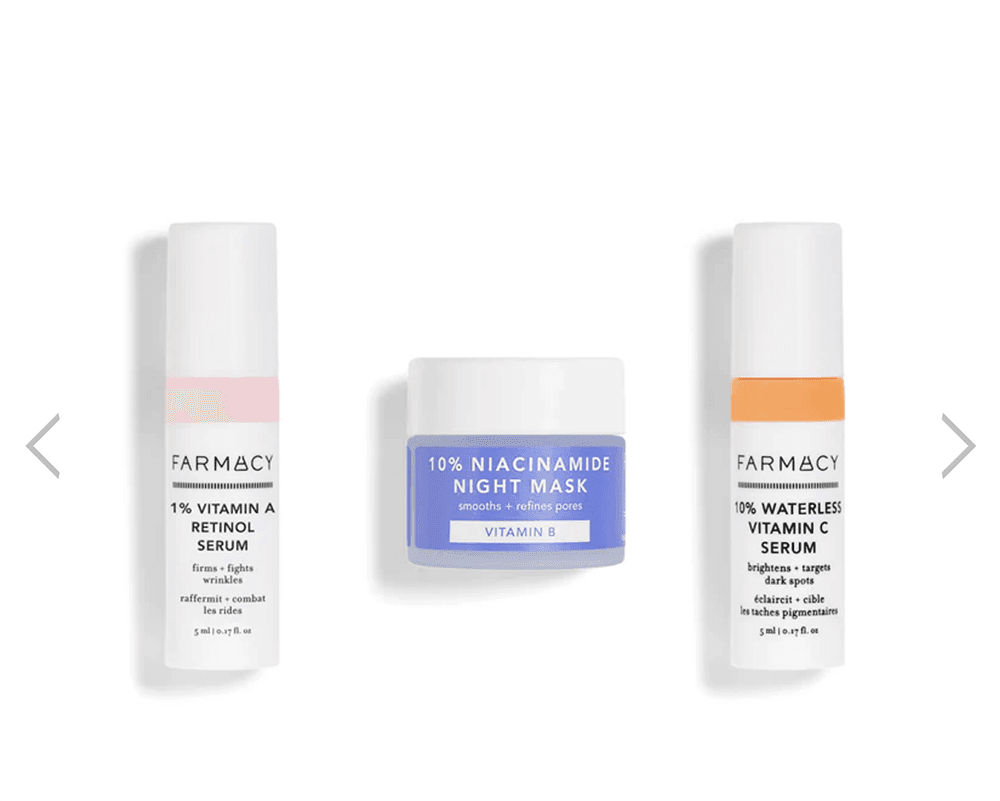
- Adding a Drop Shadow: If the shadows in your original shoot didn’t quite achieve the desired effect, you have the option to introduce a realistic drop shadow during the post-processing stage, typically accomplished using software like Photoshop. This technique brings a lifelike dimension to your product, transcending it beyond mundane stock photo territory. Example: Farmacy‘s adept use of shadows enhances the product’s realism, elevating it from standard stock photography.
- Incorporating Reflection Shadows: Unlike natural shadows, reflection shadows are often introduced during post-production. They serve as a valuable tool to infuse drama into your product images, particularly for luxury items, jewelry, perfume, and cosmetics. These products are often showcased in well-lit, reflective environments such as department store displays, and reflection shadows recreate that immersive, three-dimensional feel. Example: Revision Skincare demonstrates the effective use of reflection shadows, contributing to a more dynamic and realistic product presentation.
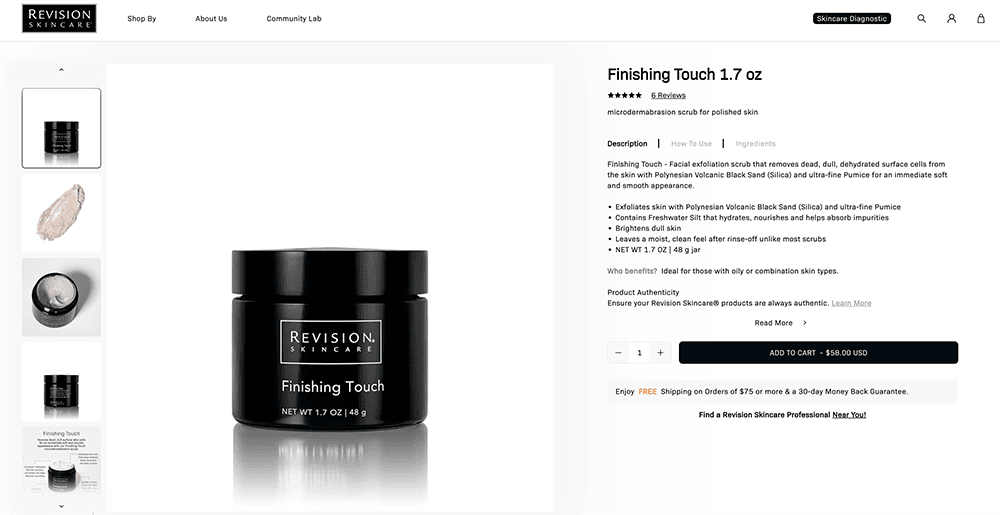
By mastering the manipulation of shadows in your product photography, you can breathe life into your images and create a compelling visual narrative that resonates with your target audience.
9. Fixing the colors to appear realistic and lifelike
In the realm of product photography, authenticity is paramount. While striving for visually appealing images is essential, it’s equally crucial to refrain from over-editing or exaggerating your products to the point of unreality.
From a color perspective, this entails avoiding the use of filters or excessive saturation. It’s imperative that the colors depicted in your images faithfully represent the actual hues of the product in real life.
This becomes particularly critical when dealing with clothing, a product category known for its high return rates. While size and fit issues are primary reasons for returns, discrepancies between the color shown on your website and its real-life appearance can also significantly impact return rates.
By maintaining a commitment to accuracy and realism in your product photography, you build trust with your customers and minimize the likelihood of dissatisfaction and returns, ultimately fostering a positive shopping experience.
10. Efficiency Through Color Editing in Product Photography
In the realm of product photography, harnessing the power of color change edits offers a savvy approach to maximizing your investment. Rather than capturing multiple shots of the same product in various colors, you can streamline the process by taking a single photograph and creating the color variants through post-processing techniques.
Top-tier e-commerce brands have effectively employed this strategy, utilizing color variants to swiftly showcase how a product would appear in different hues without the need for an entirely new photoshoot. They maintain consistent models, styles, and overall aesthetics, simply implementing edits to alter the product’s color during post-production.

For instance, consider the example of True Classic, which efficiently exhibits a product bundle featuring nine identical t-shirts, each in a distinct color. This approach not only optimizes resources but also allows for a seamless and cohesive presentation of product variations, ultimately enhancing the shopping experience for customers.
11. Elevating Product Presentation: The Importance of Wrinkle-Free Apparel
In the world of product photography, the presence of wrinkles on apparel can project an image of sloppiness and unprofessionalism. Moreover, it may lead shoppers to question not only the quality of your products but also the level of service you provide. Despite your best efforts to iron and steam diligently before and during the photo shoot, wrinkles can remain stubbornly persistent.
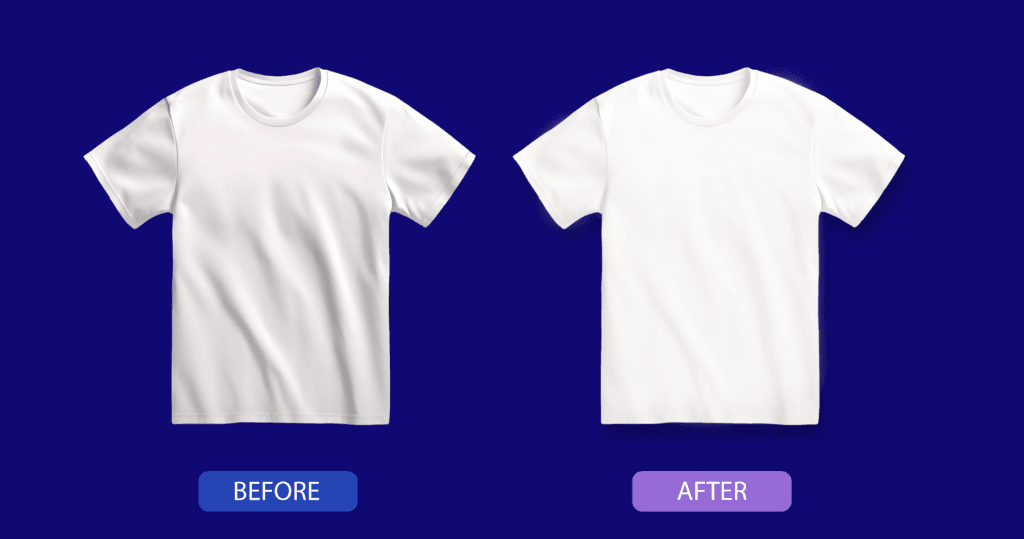
However, the process of removing wrinkles from your product photos is a relatively straightforward endeavor that reflects your dedication to detail. Importantly, it doesn’t demand an excessive amount of additional time. By ensuring wrinkle-free apparel in your product images, you convey a commitment to excellence and demonstrate a meticulous approach to your business, ultimately enhancing the perception of your brand in the eyes of potential customers.
12. Diversifying Your Product Media: Elevate Your Sales Potential
In today’s dynamic e-commerce landscape, product photography extends beyond static images. Many highly successful e-commerce brands leverage various media formats, such as animated GIFs and product videos, to offer a more engaging shopping experience with valuable context, ultimately driving increased sales.
The good news is that you can often repurpose and leverage your existing content—photos, videos, and GIFs—across multiple channels, maximizing your efforts.
For instance, video has emerged as a primary choice for marketers, particularly short-form videos lasting under a minute, which prove highly effective for engaging social media audiences. Integrating video, even on a modest scale, can set your products apart, especially in a digital landscape where consumers consume substantial amounts of short-form content, generating a notable return on investment (ROI).
Consider the example of Graza, which adeptly incorporates both still images and video to showcase its olive oil products in action. With user-friendly editing tools like Adobe Premiere and Apple Final Cut Pro, you can craft compelling videos in a matter of minutes. To create animated GIFs, platforms like EZGIF and Make A GIF offer accessible solutions.
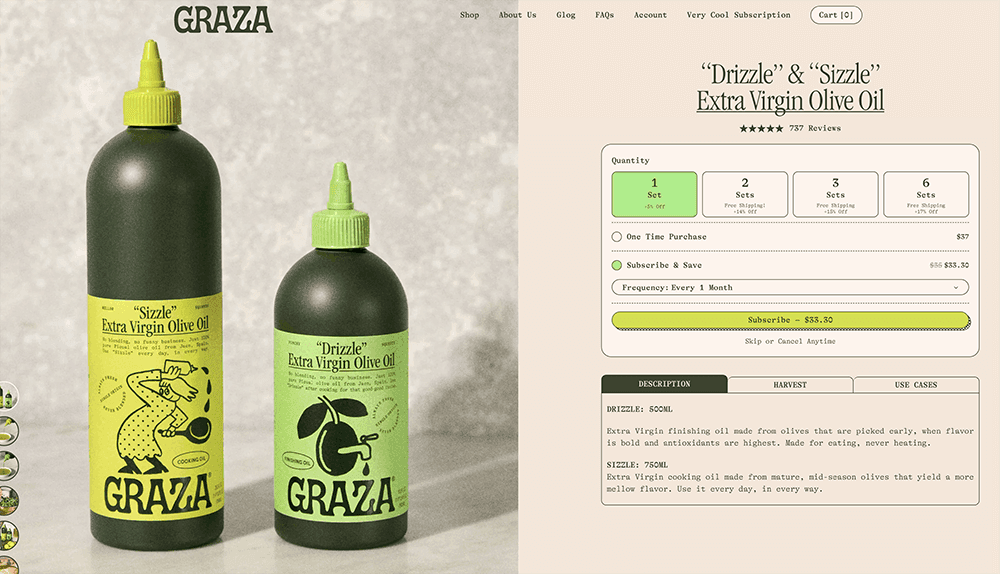
By diversifying your product media, you can unlock new dimensions of engagement, enriching your customers’ experience and driving increased conversions while efficiently utilizing your content across various platforms.
13. Optimizing image file sizes
The size of your image files directly influences the loading speed of your web pages, with larger files translating to longer loading times. A sluggish website not only delivers a subpar user experience, leading to reduced conversion rates, but it also negatively impacts your SEO, ultimately driving down your traffic.
To counter these detrimental effects, it’s imperative to reduce the file size of your photos before uploading them to your website. The good news is that there are numerous efficient methods to achieve this without compromising the quality of your product images, and you can readily access a plethora of free tools, such as TinyPNG and Kraken.io.

By optimizing image file sizes, you enhance the overall user experience, ensuring swift page loading and improved conversions. Simultaneously, you bolster your SEO efforts, attracting more traffic to your site. This strategic approach ultimately contributes to a more successful and user-friendly online presence.
14. SEO Optimization for Product Photos: Enhancing Visibility and Accessibility
In today’s digital landscape, optimizing product photos for SEO is of paramount importance. A staggering one-third of e-commerce traffic is generated through search engines, and this trend is on the rise.
One highly effective SEO practice involves incorporating alt text for all your product images. Beyond SEO benefits, alt text serves a crucial role in aiding individuals with visual impairments in navigating your website. Alt text is a concealed data field that can be added during image editing in tools like Photoshop, or at the point of image upload to your website or marketplace channel.
To maximize SEO impact and ensure accessibility, it’s essential to provide comprehensive context while describing the image in a neutral, objective manner. Here’s an exemplary instance from Semrush:
[Image: Alt text for an image of a leather wallet – “Brown leather wallet with multiple card slots and a zippered coin pocket.”]By implementing robust alt-text descriptions, you enhance the discoverability of your products on search engines, making them more accessible and appealing to a broader audience while adhering to inclusive design principles.
15. Enhancing Product Photos: The Power of Continuous Testing
While we’ve covered a wide array of strategies to optimize your product photos, it’s crucial to adopt a testing mindset as you embark on this journey. Implementing these suggestions positions you ahead of the competition, but discovering what works best for your specific business or brand requires hands-on experimentation. Relying solely on theoretical knowledge won’t suffice; practical testing is essential. Of course, staying informed about the latest consumer behavior research is a valuable starting point.
E-commerce consumer research conducted by PickFu reinforces the significance of pricing and product images in consumer decision-making. Approximately 50% of surveyed consumers prioritize price, with half of them subsequently focusing on product photos. While product titles and descriptions maintain their importance, they were deemed less critical by those surveyed.
To execute effective tests on your product photos, you must establish a baseline to serve as a reference point for evaluating various photo variations. Here’s a practical example: On the left, you have the standard baseline, while on the right, you introduce different product categories and offerings.
Here are some key areas to explore in your testing journey:
- Big vs. Small Product Photos: Begin by experimenting with different image sizes on your product pages. Consider testing smaller photos against larger ones, ensuring that images remain visually appealing on mobile and tablet devices to yield meaningful results.
- Number of Images: Explore the impact of displaying a few products per page versus showcasing your entire collection. Monitor changes in metrics like purchases and add-to-cart actions over a defined period. Maintain consistency in your testing parameters for several weeks before introducing additional changes or experiments.
- Lifestyle vs. White Background Photos: Delve into the influence of various backgrounds and contexts in your product photos across social media, product collection pages, and advertising. Establish a baseline Click Rate (CTR) and leverage social media platforms for swift feedback. Consider experimenting with “quick view” options to enhance customer engagement without the need to open new pages.
By adopting a proactive testing approach, you can fine-tune your product photography strategies, uncover what resonates best with your audience, and continuously optimize your visuals for superior results in the competitive e-commerce landscape.
Suggested articles >>


